Chris John
Expert
Published on: Apr 20, 2026
CBIC Sanchar
The Directorate of Data Management (DMM) had successfully launched an application on the Central Board of Indirect Taxes and Customs/ CBIC-DMM portal in January of 2019. This application, named as CBIC Sanchar, is formed to receive feedback concerning any actions taken and its resulting recoveries of tax based on analytical reports made by The Directorate General of Analytics and Risk Management (DGARM). These reports are regularly being reviewed, monitored, collected and combined by the DGARM Officers, and the efforts are being informed continuously to the Board. This article talks about the CBIC Sanchar application and the features of the same.
Overview
The DMM has continued to expand the scope of this application to offer the CBIC with a digital platform that can facilitate quick, easy and effective communication in a streamlined form. The CBIC Sanchar facilitates a digital connection between the Board to all of the Board's formations, all the way to the division level. The CBIC Sanchar has four main independent applications under the following category:
- Analytical Reports of Directorates
- Key Performance Indicators
- General Communication
- Prosecution Management
Each of these sets comprises of specific modules that are developed along the same lines of the pre-existing module concerning DGARM. These modules are protected with the help of One-Time Passwords (OTPs) that will be sent to users on their registered mobile numbers. CBIC Sanchar is a completely paper-free communication tool that can be accessed quickly and be used by both the sender, as well as the recipient. It permits the user to search and review reports based on the structured data fields in different file formats such as Text, Excel and PDF documents. Moreover, Masterdesks offer essential information for effective monitoring of the sent reports, received responses and pending responses. There also exists a scope to issue reminders and consolidate reports that are received. Overall, CBIC Sanchar can significantly save time, effort and expenses apart from being environment-friendly. Every CBIC Official is expected to completely utilise CBIC Sanchar to boost CBIC in terms of digital communication and e-Governance.
Process
The following is the process to operate CBIC Sanchar and various applications under the same, in detail.
Access to CBIC Sanchar
The following procedure has to be followed to access the CBIC Sanchar application.
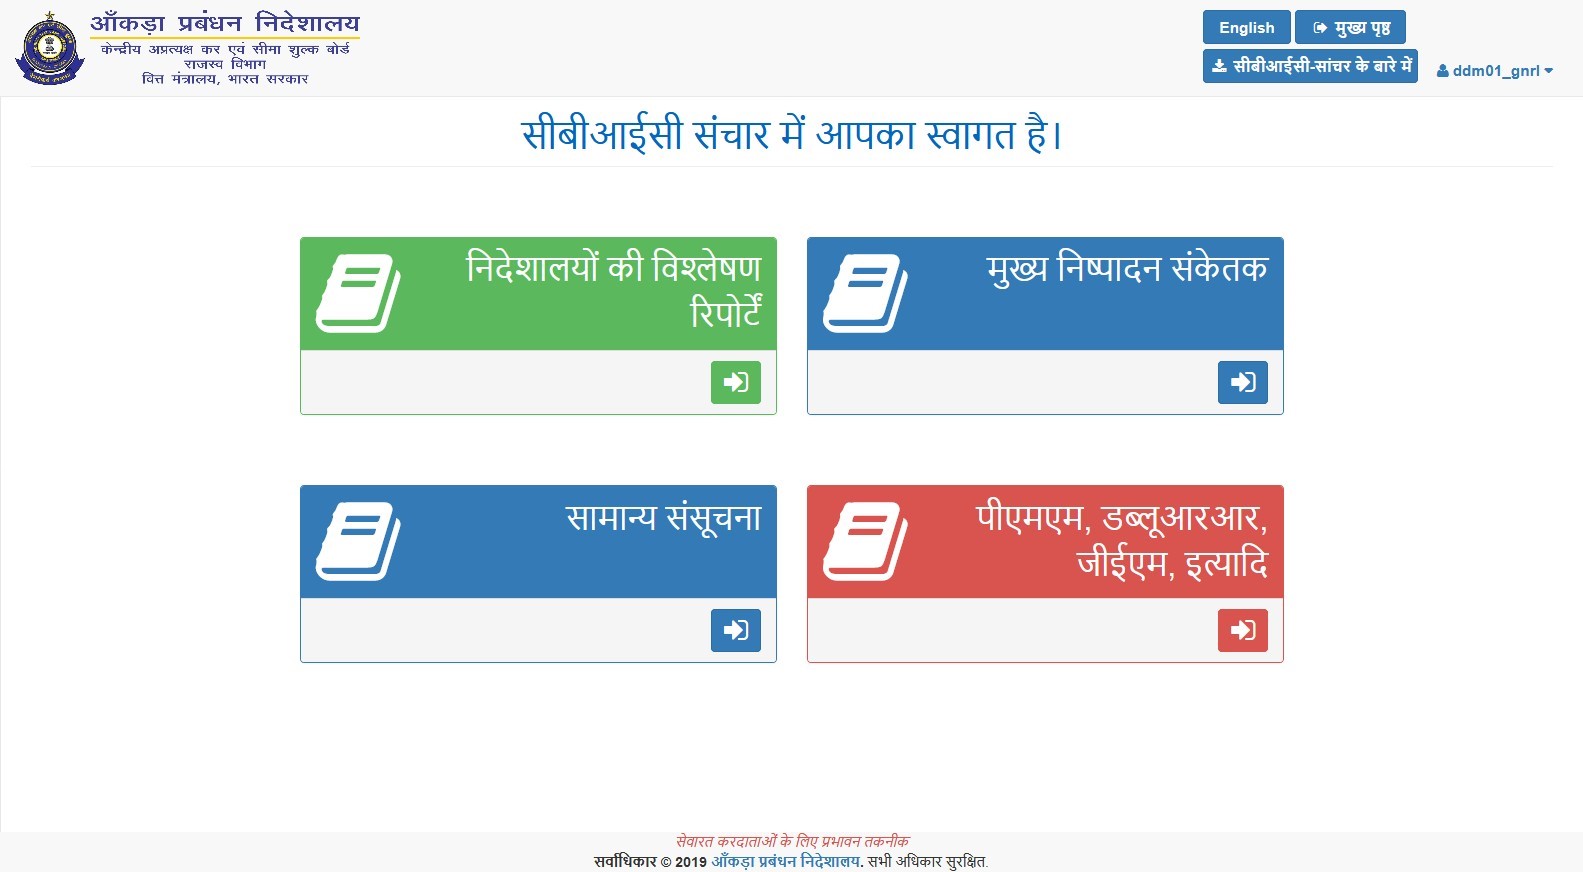
Step 1: Visit the CBIC-DMM portal. Click on the CBIC Sanchar option on the tab on top of the page. The login page for CBIC Sanchar would be displayed next.
 Step 2: Click on the Login icon. After logging in with valid credentials, the Masterdesk for the CBIC Sanchar would be displayed next.
 Note: The language of the Masterdesk may be changed as per the user's wish by clicking on the available options on the top-right of the Masterdesk page.
 Step 3: Click on the Enter icon below any of the four applications under CBIC Sanchar. A pop-up would be displayed that contains a brief introduction to the modules in that particular application. Click on the green arrow icon to enter the application. Alternatively, click on the red arrow icon to return to the CBIC Sanchar Masterdesk.

Analytical Reports of Directorates (ARD)
This application is designed for the CBIC Directorates to send out analytical reports to the field Directorates for necessary or immediate action. Real-Time Monitoring and Feedback Reception in a streamlined manner are the key features of this application. The following steps will indicate how the application is to be used concerning DGARM. Every Directorate is provided with a distinct module for its reports. The remainder of the modules for the other Directorates are to be utilised similarly except for the difference in the uploaded reports.
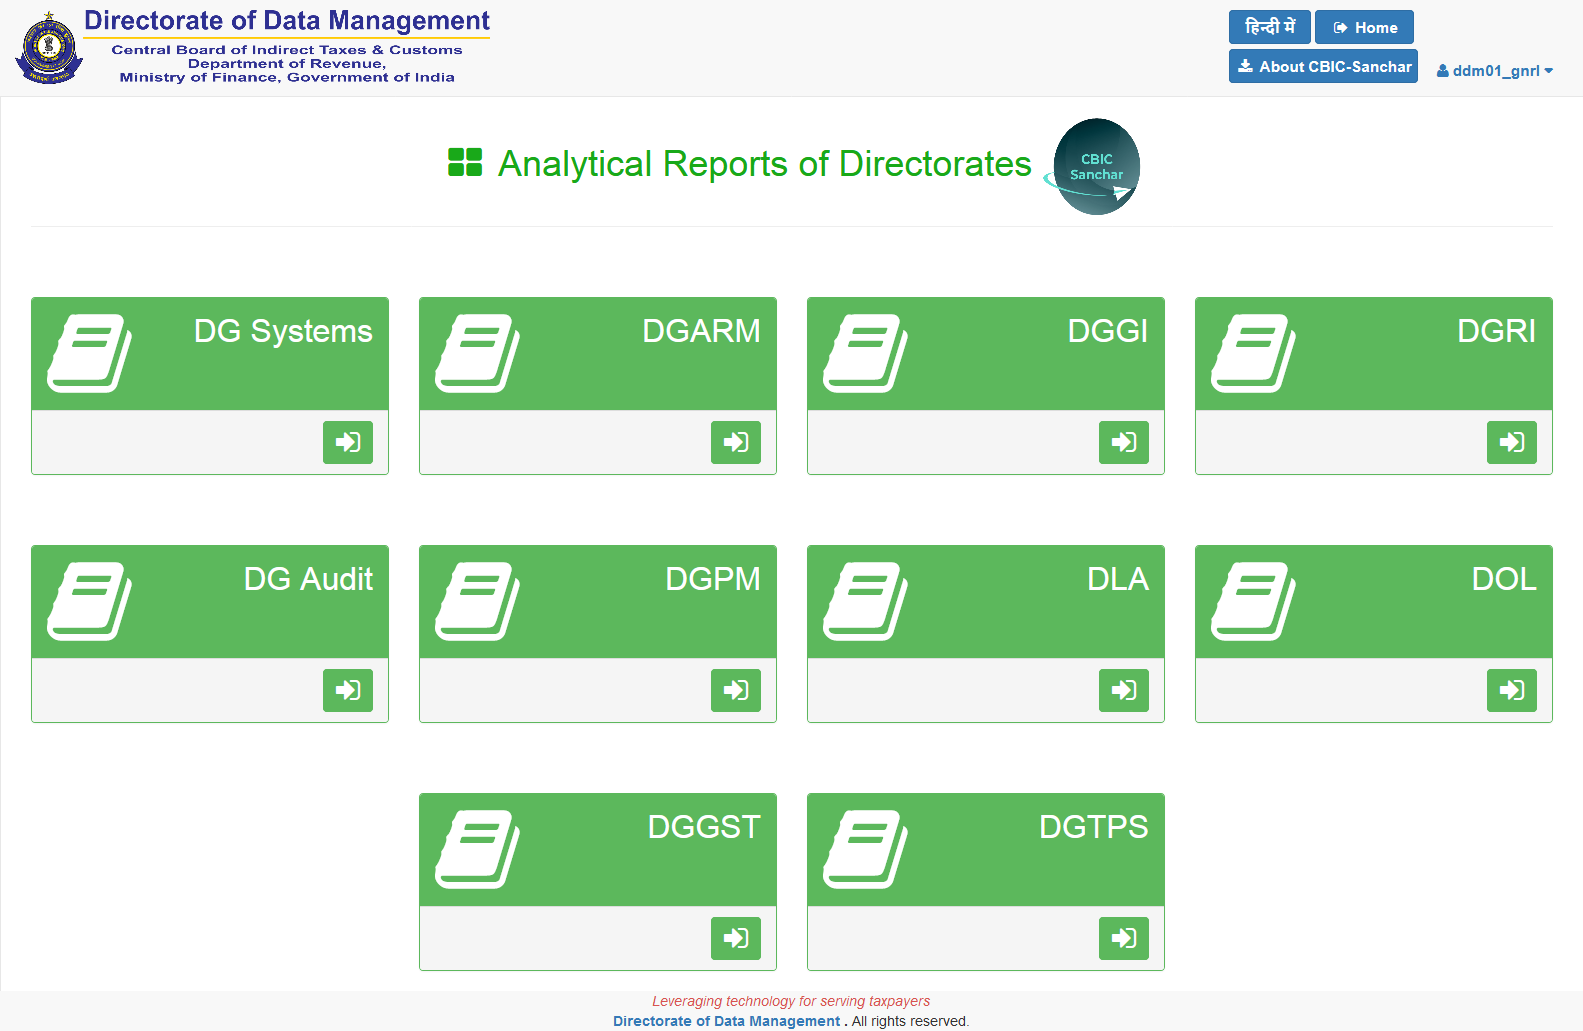
Step 1: Click on the Analytical Reports of Directorates option on the Masterdesk. Click on the green arrow after going through the introduction to the application.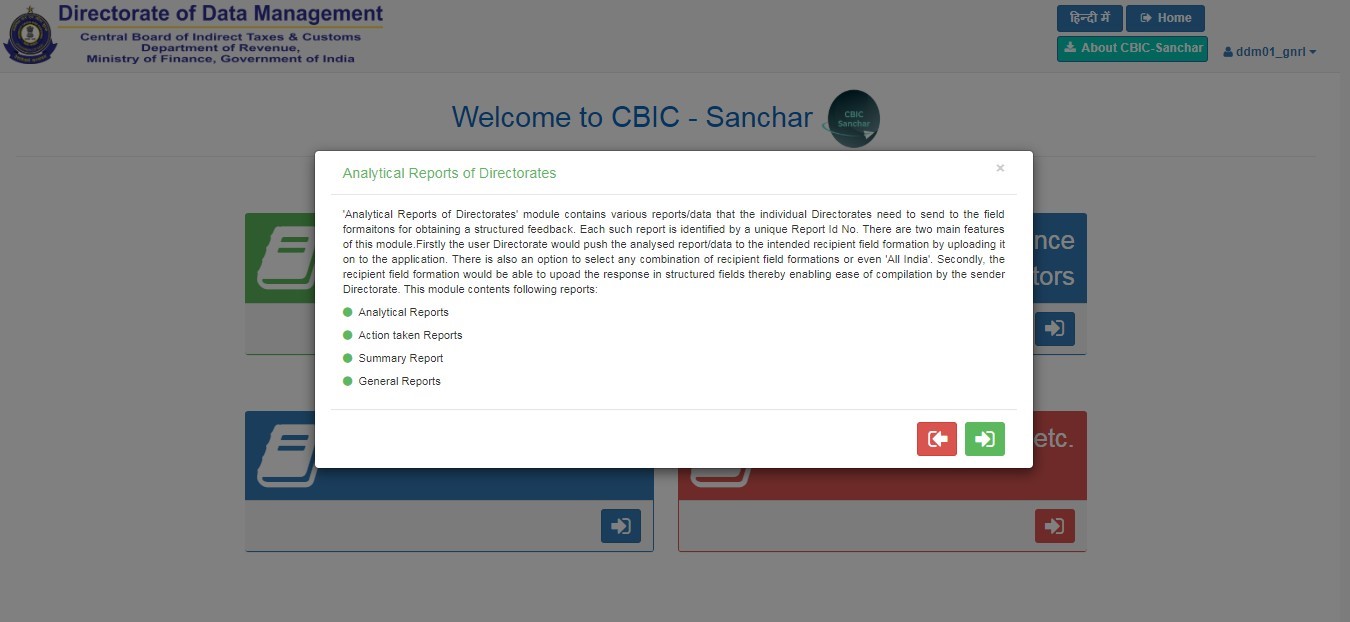 Step 2: The following page would display 10 distinct icons that represent each Directorate for the user to choose from. Every Directorate has the option to upload their analytical reports, and any field Directorate may download any of these reports to initiate protocol. Click on the green arrow icon to continue.
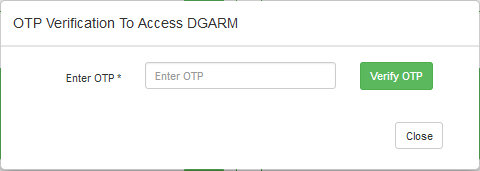
 Step 3: A pop-up inquiring for an OTP would be displayed. The OTP would be sent to the user's registered mobile number.
 Step 4: After the OTP is entered, the Masterdesk for the Analytical Reports application would appear with various options.
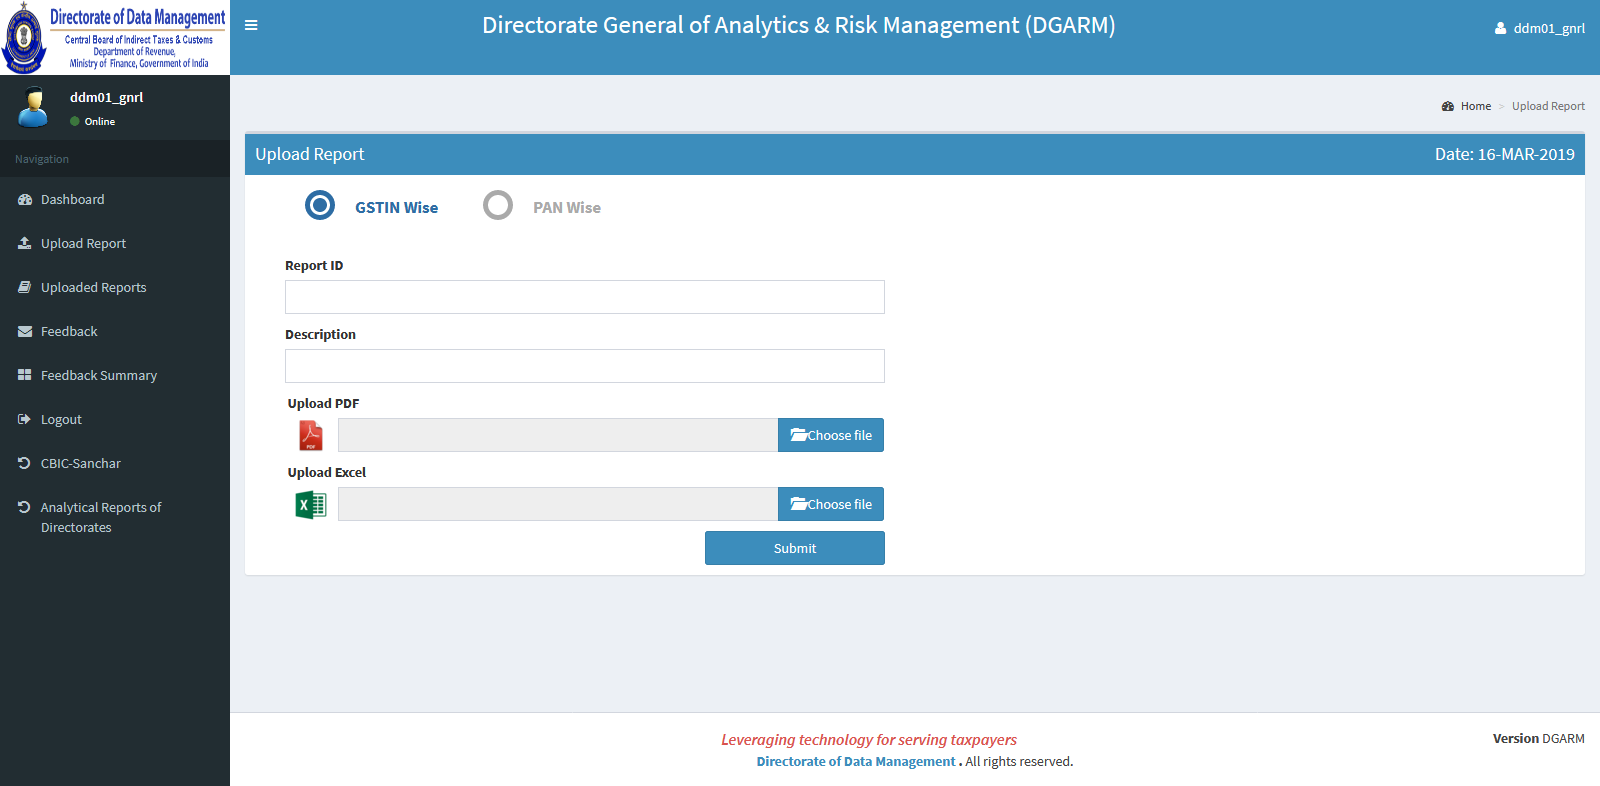
 Step 5: Click on the Upload Report option. The user may upload their report in two files, mainly a PDF file and an Excel sheet. The PDF file is a brief description of the kind of data being sent while the Excel sheet comprises the actual information to be acted upon. Then, click on the Submit icon.
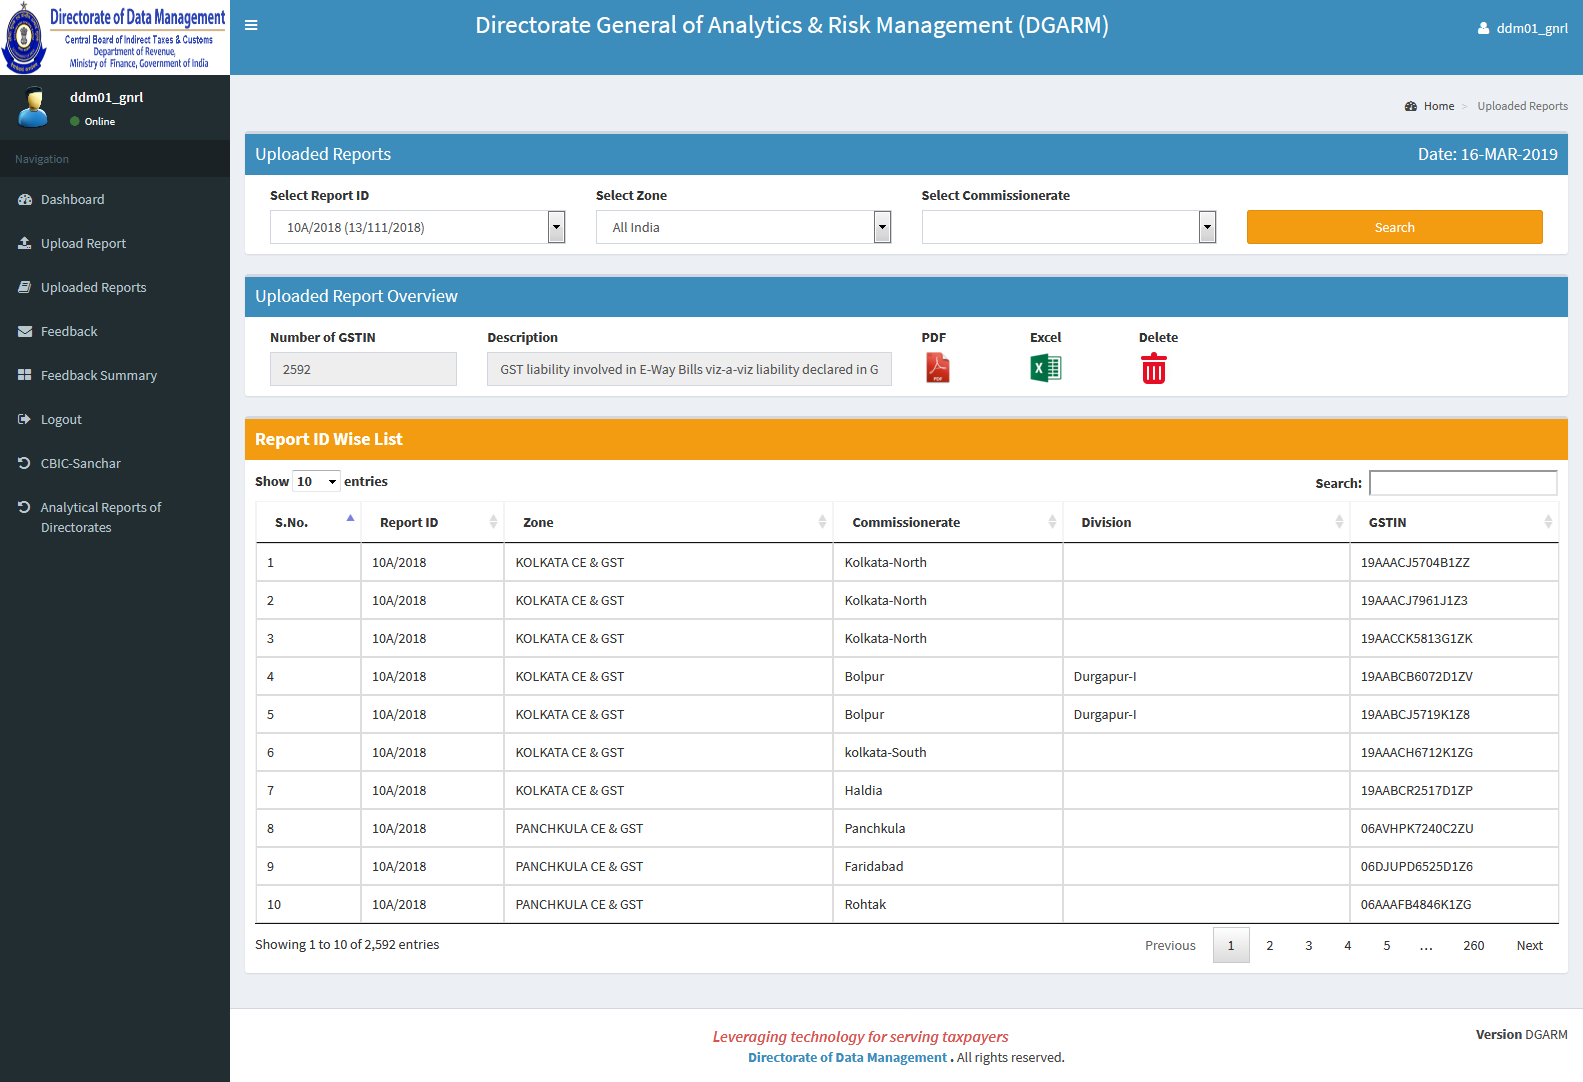
 Step 6: The uploaded reports may be viewed as shown below. A particular report may be selected, and the contents of the same may be viewed.
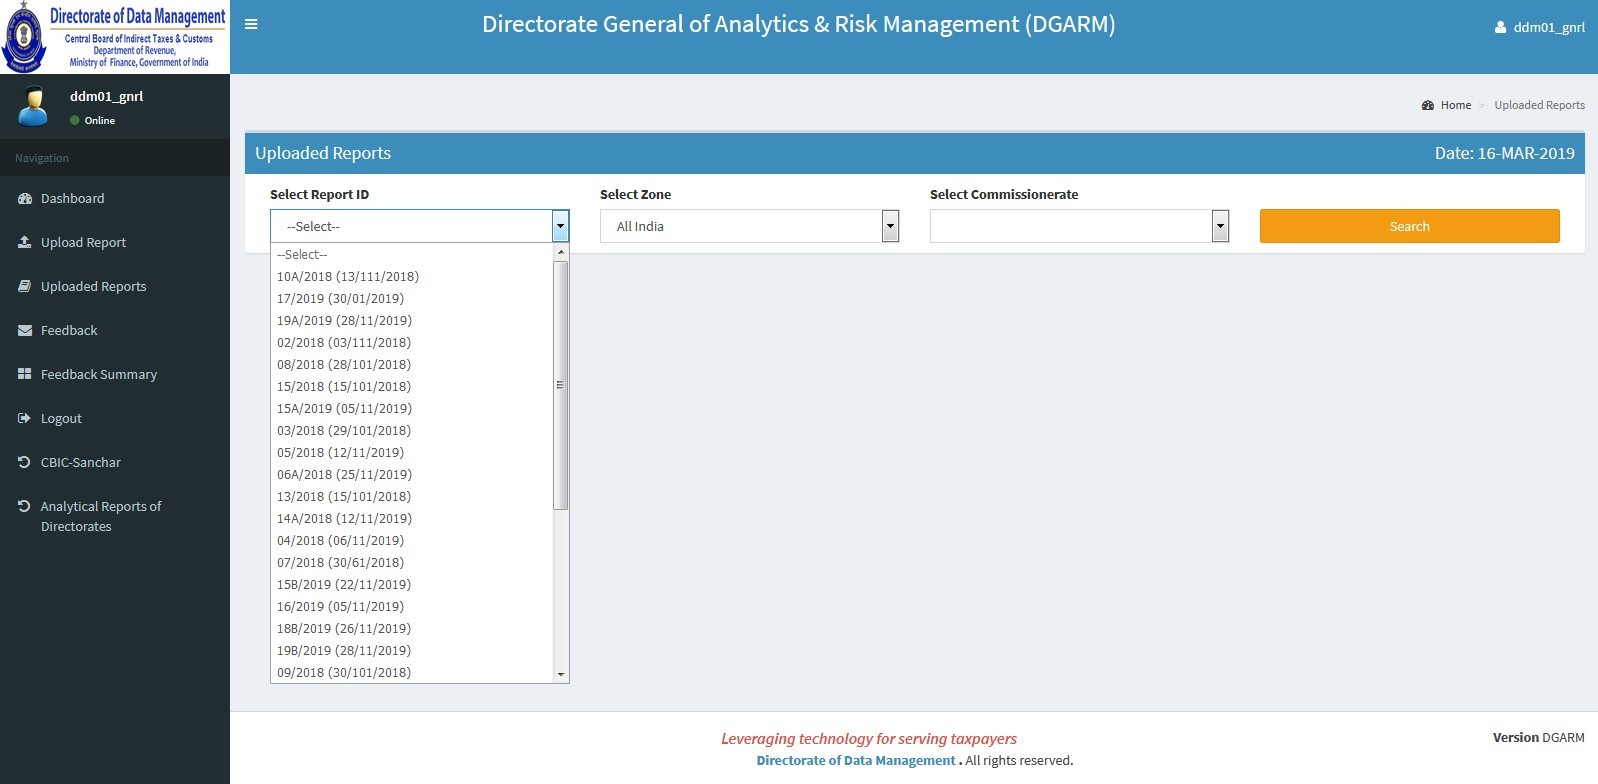 Step 7: Click on the Search tab. The total number of GSTINs, along with their descriptions and their data in an Excel sheet format, may be viewed in this section.
 Step 8: The Director will be able to view the feedback received on every report.
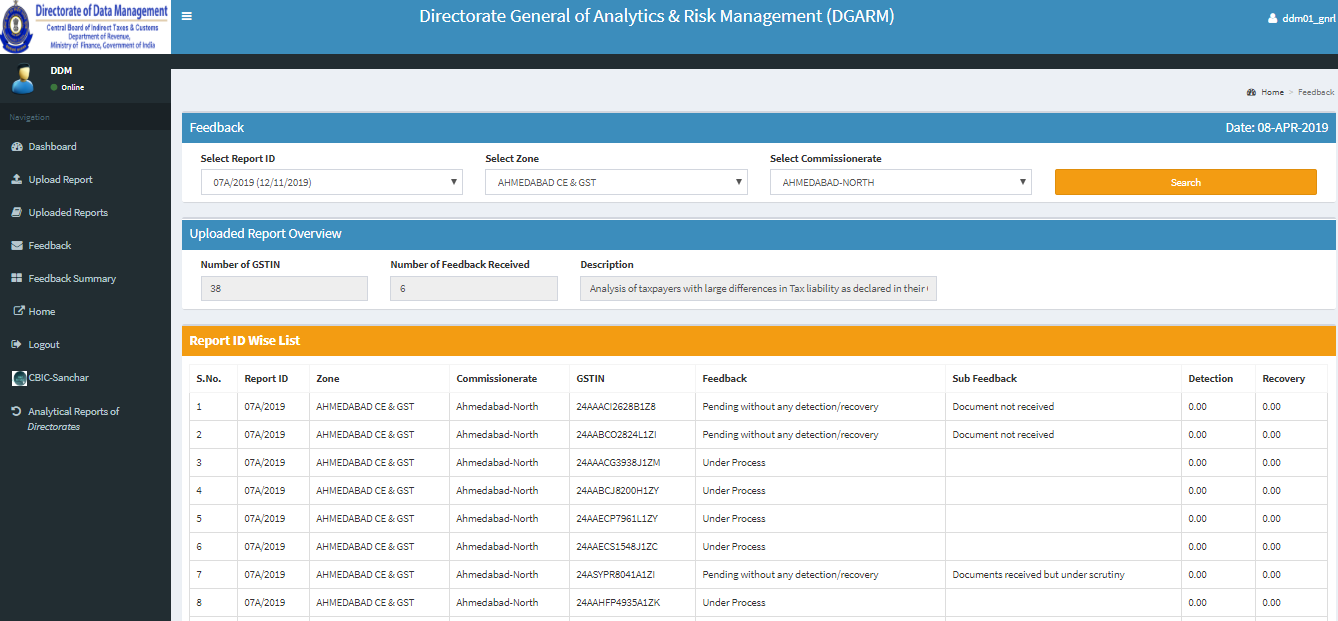 Step 9: The summary of every feedback received from other Field Directorates may be viewed as shown below.
 Step 10: Click on the Received Reports option. This would show the recipients who will be able to upload their feedback with respect to individual GSTINs in their particular jurisdiction.
 Step 11: Click on the Upload Feedback icon. The recipients are required to upload their feedback after choosing appropriate options from the drop-down menu.

Key Performance Indicators
This application allows the review of 9 crucial areas of the Department's functioning such as the revenue, anti-smuggling, anti-evasion, audit, adjudication, legal, arrears recovery, logistics and valuation. Every module in this application is connected to the Monthly Performance Report (MPR). The collected data is collated from these modules, and a summary report is generated accordingly by the system.
Step 1: Click on the blue entry icon on the Key Performance Indicators application. Step 2: Next, the Masterdesk would appear. Option for four major reports would be displayed.
- Monthly Performance Report (MPR)
- Monthly Summary Report (MSR)
- Monthly Revenue Report (MRR)
- Monthly Revenue Performance Report (FMR)
 Step 3: Click on the Monthly Performance Report (MPR) option. The components of the module may be viewed by selecting the domain stream, month, year and jurisdiction.
 Step 4: Various components of the MPR like Part-I, Part-II, Part-III would appear. The option to view and download any of these MPR components would be available by clicking on their respective icons.
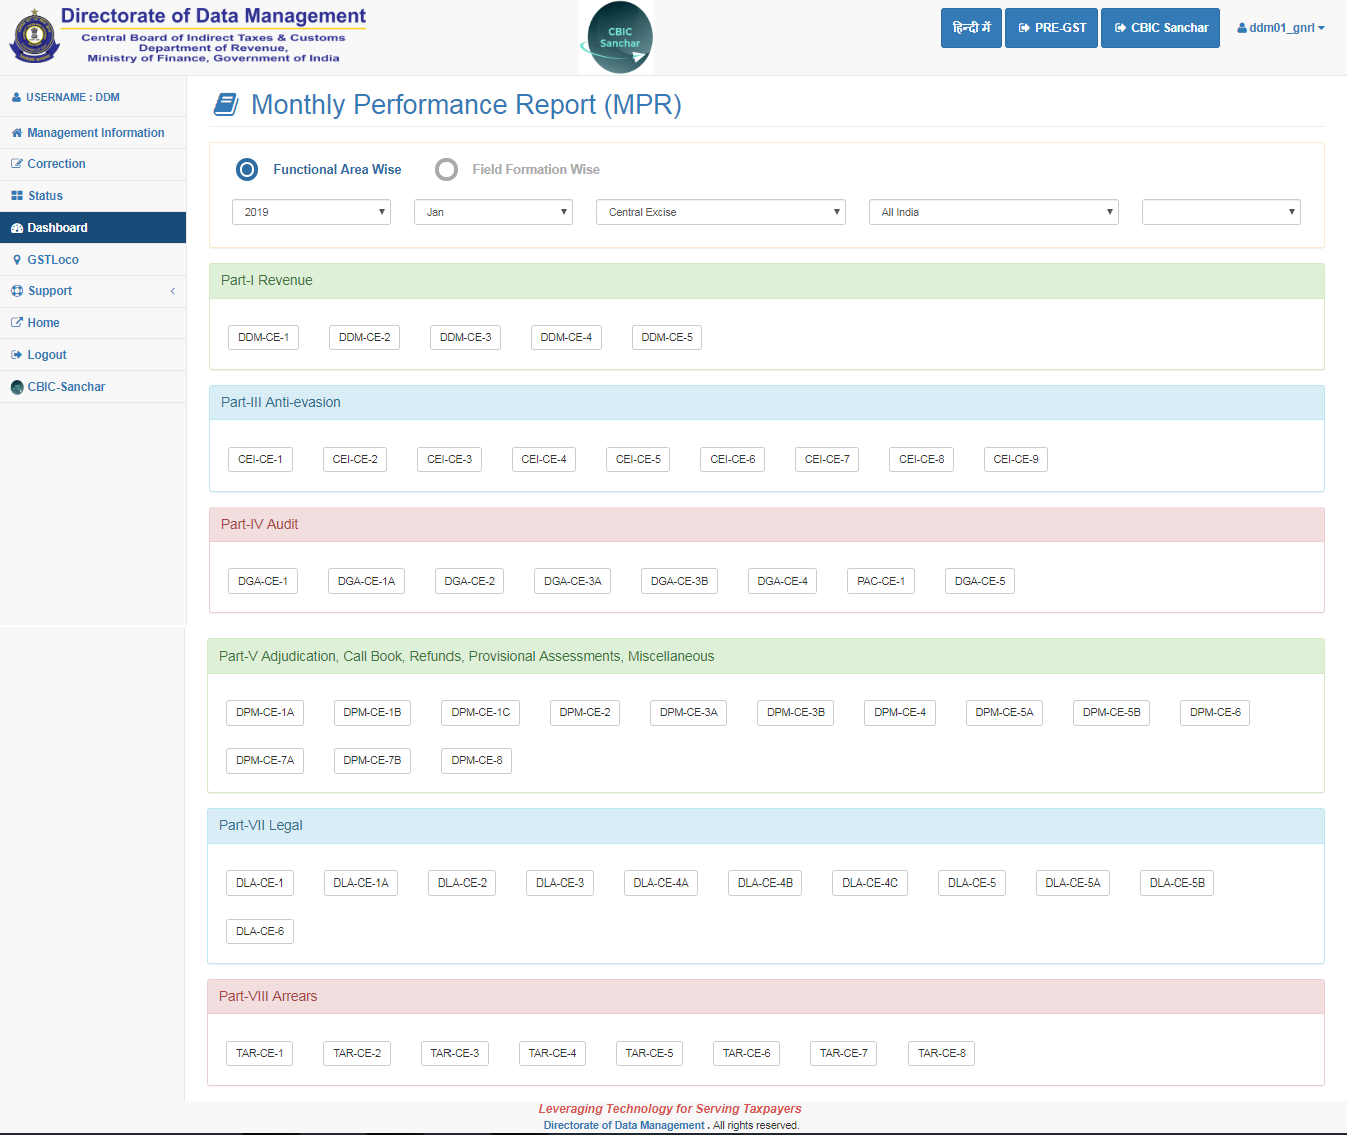 Step 5: Various components of the MPR like Part-I, Part-II, Part-III would appear. The option to upload data concerning any of the components for any specific jurisdiction would be available.
 Step 6: The option to correct uploaded data is also provided by sending a correction request to the Functional Owner of the particular report. Corrections may be made after an approval is granted.
 Step 7: The status of MPRs may be assured by viewing the status of the uploaded report of any given jurisdiction.
 Step 8: The status of MPRs may be assured by viewing the status of the uploaded Field Formation.
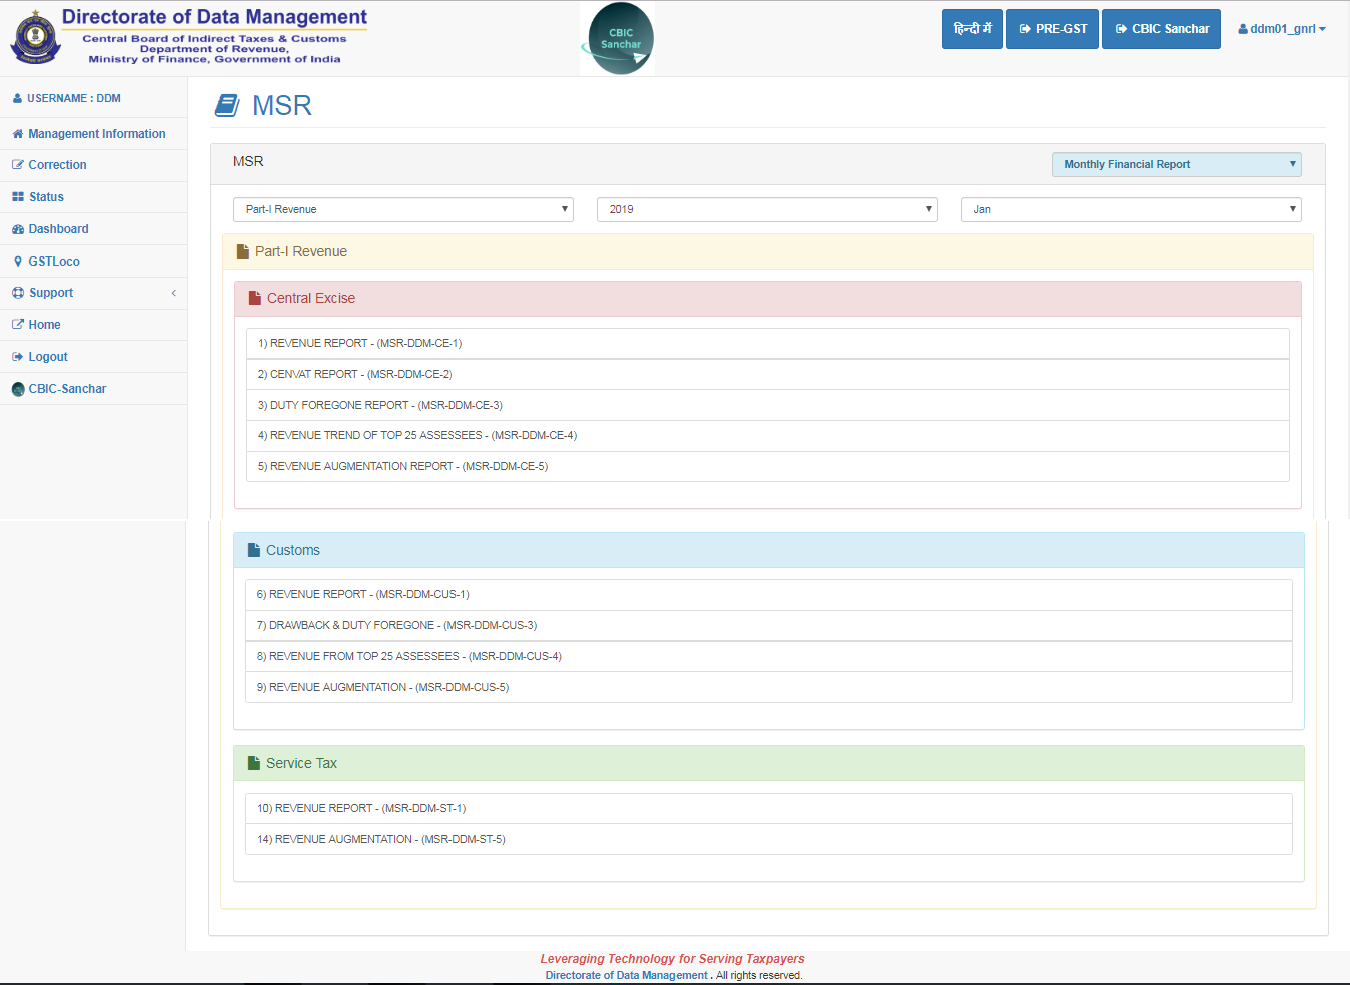
 Step 9: Various components of the Monthly Summary Report/ MSR like Part-I, Part-II, Part-III would appear. The option to view and download any of these MSR components would be available by clicking on their respective icons.
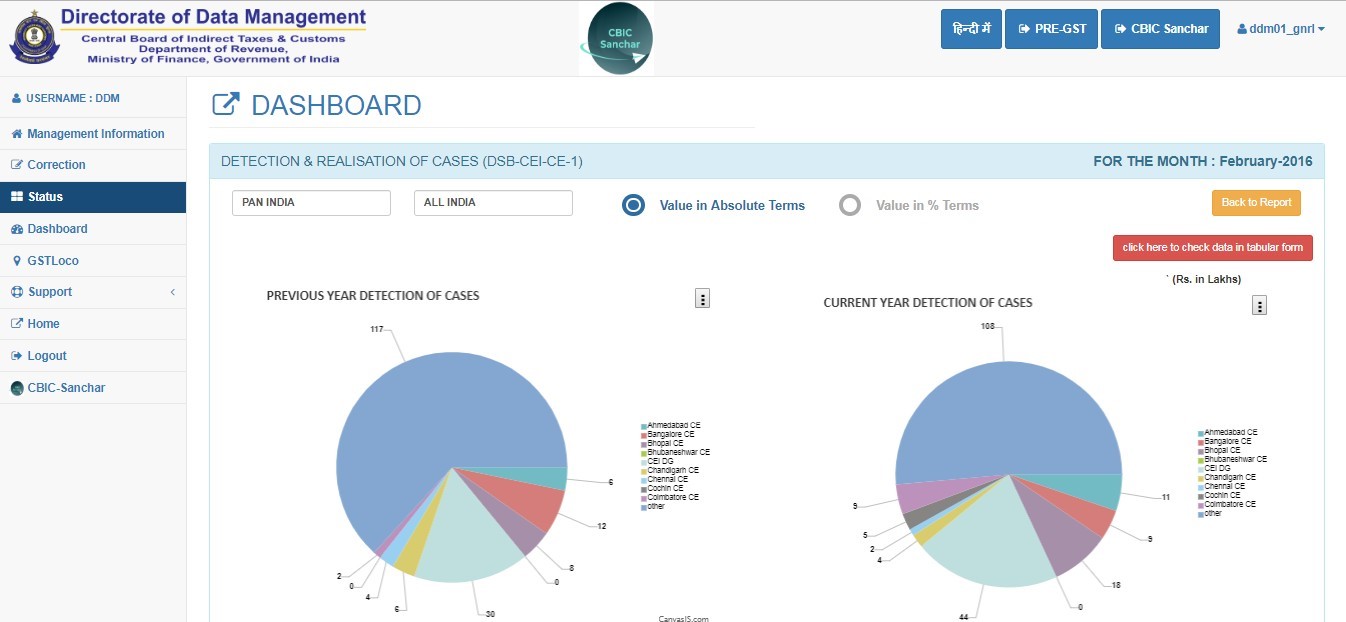
 Step 10: The various components of the Dashboard such as Part-I, Part-II, Part-III and more would be displayed. There is the option to view the graphical representations of any of these MPR components concerning a particular jurisdiction by selecting that icon.
 Step 11: Click on the Dashboard option. The graphical representations of the MPR components regarding a specific jurisdiction may be viewed by selecting that icon.
 Step 12: Click on the Zone Wise Break Up icon. The screen would display the graphical representations of any of the MPR components concerning a particular jurisdiction.
 Step 13: Click on the Helpdesk option. This allows a query to be raised to the Helpdesk by filling essential information and generating a Ticket Number after the submission.
 Step 14: The user may view all the summary of all queries sent to the Helpdesk and the status of the same may be seen here.

General Communication
This application offers the CBIC and all its formations with a digital platform for easy, quick and effective communication in a streamlined manner. The modules in this application facilitate a 2-way, and their Masterdesks offer essential information to monitor every report sent, responses received and pending.
Step 1: Click on the blue entry icon for General Communication. A pop-up displaying a brief introduction to the modules in the application would appear. Step 2: The Masterdesk would appear. Here, the status of every communication, be it a Sender or as a Recipient, may be viewed.
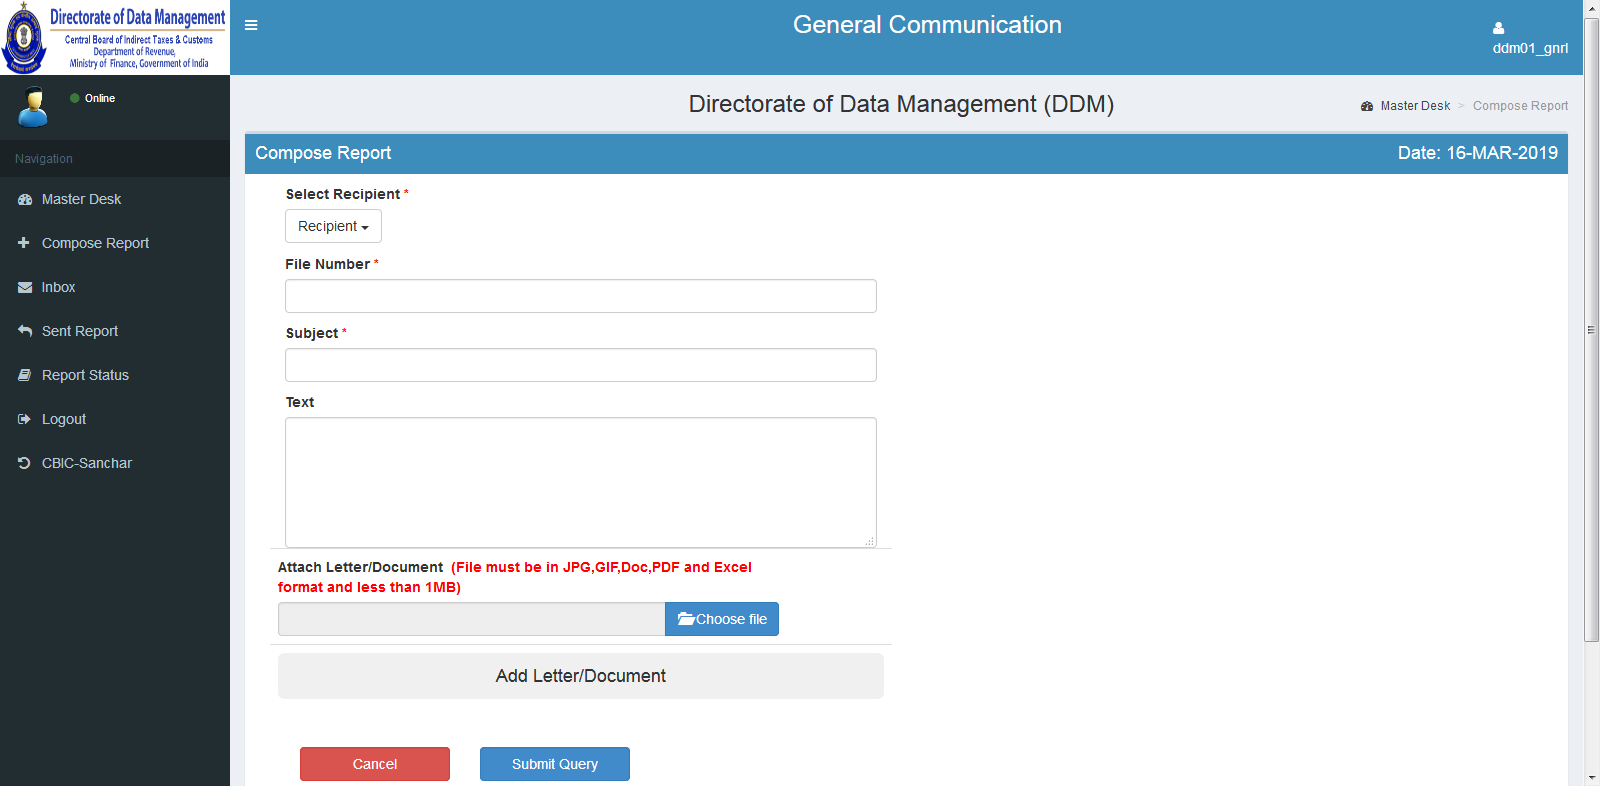
 Step 3: Click on the Compose Report icon. To compose their report before submission, the user would be required to provide the following information:
- File number
- Subject
- Text
- Documents are to be uploaded by selecting one or more recipients from the drop-down menu.
 Step 4: The following would appear where the selection of intended recipients of the communication from the drop-down menu of every the Field Formations/ Directorates may be viewed.
 Step 5: The following would appear where the information or feedback on every report received from every the Field Formations/ Directorates may be viewed.
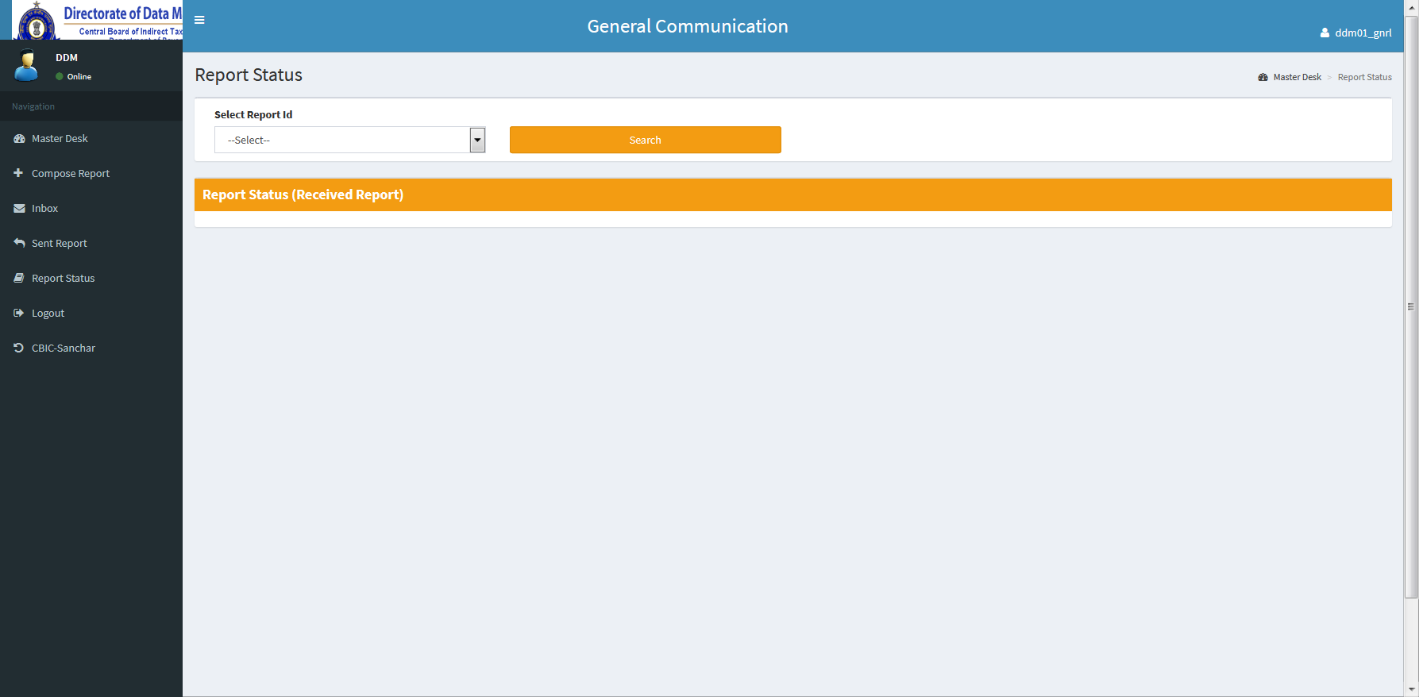
 Step 6: The status of all the reports received may be viewed. The user is required to select the relevant Report ID Number assigned to an uploaded report from the drop-down list, after which the user may view the status of that particular report.
PMM, TDOTS and WRR
The Prosecution Management Module, Tax Disputes Online Tracking System and Weekly Refund Report application have a distinct set of modules for some critical areas of departmental work that involves the PMM and the TDOTS at various appellate fora, High Courts and Supreme Courts, as well as monitoring for Refunds weekly. There are five significant applications with distinct functions, and they are as follows:
- Prosecution Management Module
- Tax Disputes Online Tracking System
- Weekly Refund Report
- Government eMarketplace
- Audit Efficiency
 Step 2: Click on the red entry icon on the Masterdesk on the required application.

Prosecution Management Module (PMM)
Step 3: The Masterdesk for the Prosecution Management Module (PMM) would be displayed.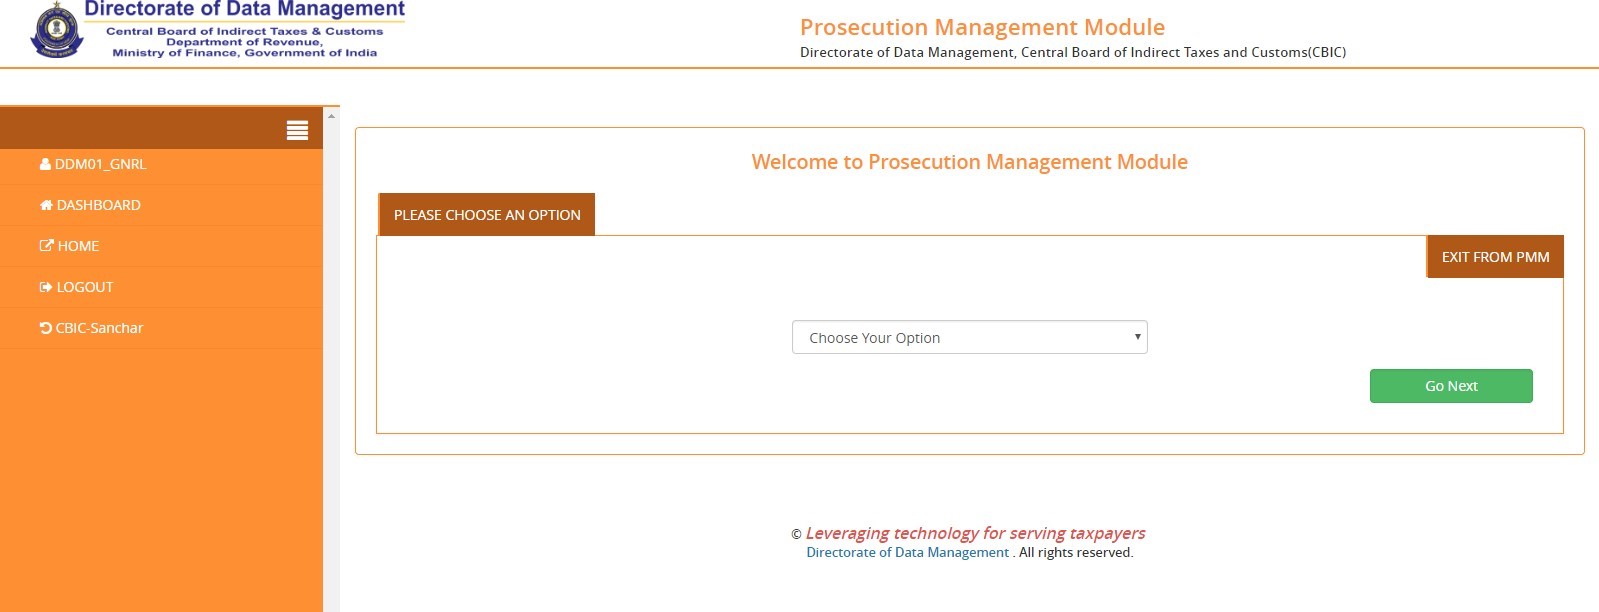 Step 4: The next page would display any pre-defined reports with respect to PMM.

Weekly Refund Report (WRR)
Step 5: The Masterdesk for the application for Weekly Refund status would be displayed on the next page. This would enable the monitoring of every refund weekly. Step 6: The page for uploading information in the template provided in spaces 1 to 9 would be displayed. Relevant data is to be entered in these spaces.
 Step 7: The page for viewing Cumulative Reports of Refunds that are processed/ sanctioned weekly would be displayed.

Tax Disputes Online Tracking System (TDOTS)
Step 8: The TDOTS Masterdesk monitors all the pending tax disputes at multiple levels such as Commissioner, CESTAT, High Courts and Supreme Court. Step 9: The next page would display data concerning pending tax disputes at various fora which were received from Field Formations.

Audit Efficiency
Step 10: The Masterdesk for the Audit Efficiency module has been developed for monitoring the status of every audit exercises to ensure that the audit is being conducted as per the Audit Manual. Step 11: The page would display to upload the Audit Report prescribed for the particular module.

Government eMarketplace (GeM)
Step 12: The Masterdesk for Government eMarketplace (GeM) module is used to track all the purchases made by departmental offices through GeM. Step 13: The page for uploading details of the payments made for all the purchases made by Field Formations/ Directorates through GeM would be displayed.
