Thushitha
Expert
Published on: Jun 24, 2026
Tamil Nadu Caste Certificate
Caste certificate is a documentary proof of a person belonging to a specific caste, as categorized under the Indian Constitution. It is also commonly known as a community certificate. The issuance system of permanent caste or community certificate was initiated in Tamilnadu in the year 1988. Caste certificates are used to provide certain privileges to Scheduled Castes and Scheduled Tribes to bring equality among all the citizens. Thus, a caste certificate is mandatory for receiving any such benefits for a person belonging to Scheduled Cast or Scheduled Tribe community. In this article, we look at the procedure for obtaining Caste Certificate in Tamilnadu.
Documents Required for Caste Certificate
The following are the documents required for applying for Caste Certificate in Tamilnadu:
- Completed application form
- Ration card copy
- School leaving certificate or transfer certificate
- Caste Certificates or school certificates of parents
Application Process
The Caste Certificate application process is different for BC, SC, ST and OBC categories:
For BC, SC or ST Categories
The following are the steps involved in applying for Caste Certificate for BC, SC or ST categories:
Step 1: Visit the Government of Tamilnadu official website using the link: /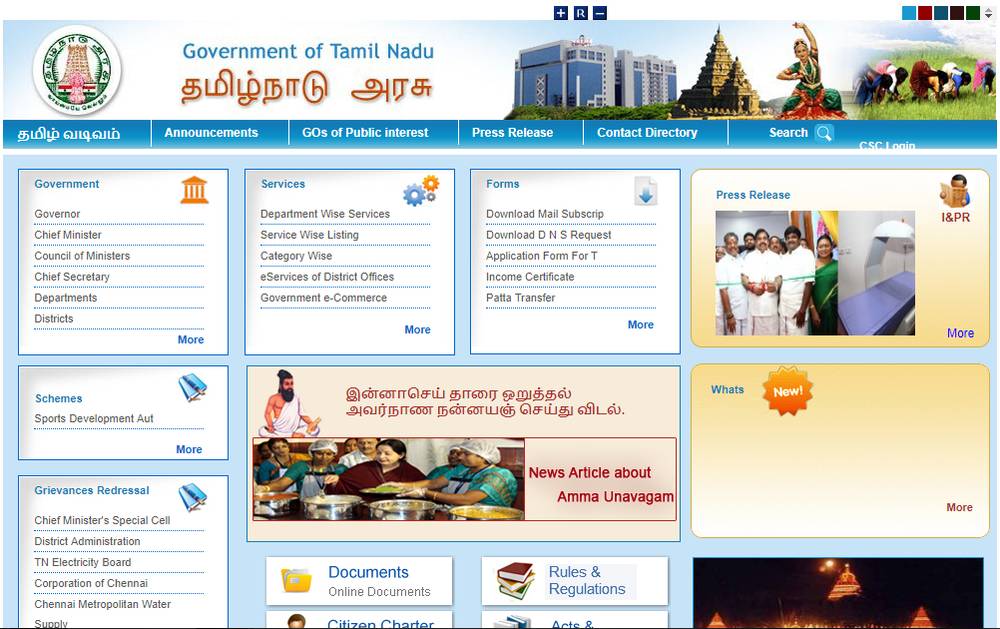 Step 2: Click on the link ‘more’ under the forms section on the webpage and type ‘community certificate’ on the search bar.
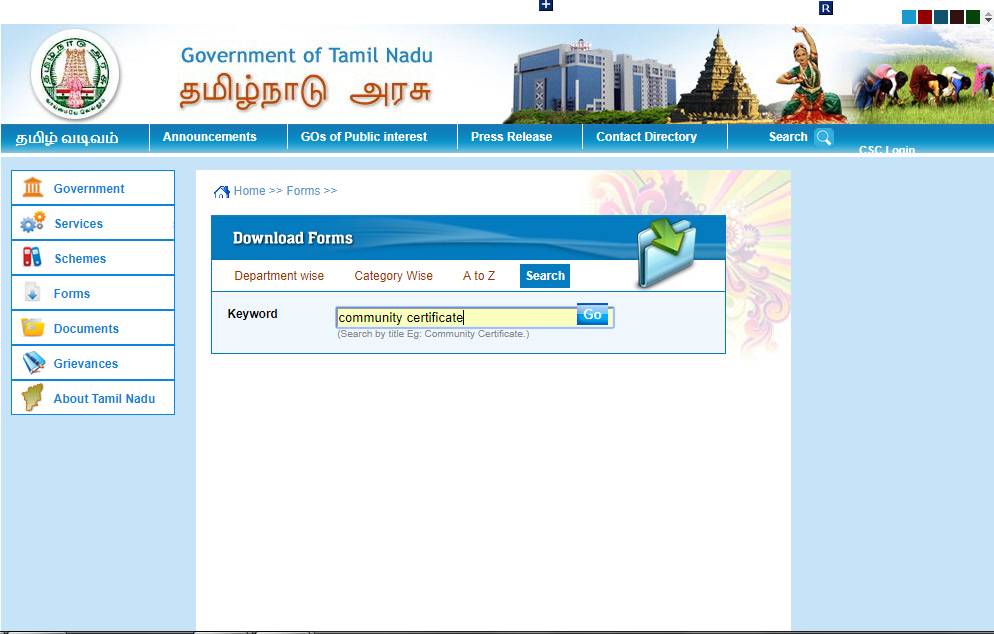 Step 3: Click on the ‘community certificate’ link to download the application form. The applicant should write the necessary information correctly, including the following:
- Applicant’s name
- Father or Husband’s name
- Sex (Female or Male)
- Residential address
- Ration card number
- Details of community certificate of parents
- Details of school certificates of parents
- Date of application
A sample of the form is provided below:
Step 4: After filling the information, the applicant should sign the form. The applicant has to attach the necessary documents to it. Step 5: The completed and signed form, along with the documents, should be submitted to the respective revenue talk office. The application submitted will be processed, and if it is successful, the community certificate will be obtained within 30 days.For OBC Categories
The following are the steps for the Caste Certificate application process for OBC categories:
Step 1: Visit the e-Sevai web portal using the link: /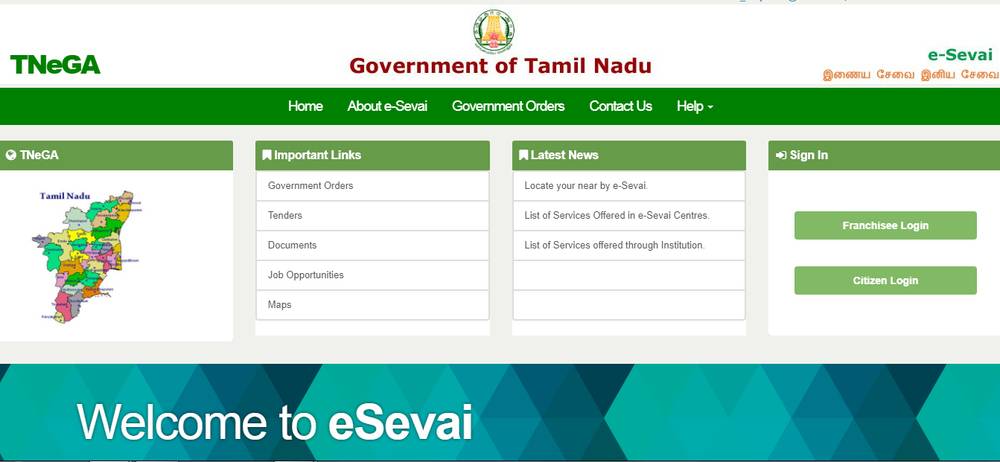 Step 2: Click on the button ‘Citizen Login’ and enter the correct login username and password.
Step 3: Now enter the Captcha code and click on the ‘Login’ button.
Step 4: Once the e-Sevai dashboard appears, click on ‘Services’ option on the left-hand side of the screen.
Step 5: The list of department wise services will appear. Select the ‘Revenue Department’ option.
Step 6: Next, click on ‘REV-115 Other Backward Classes (OBC) certificate’ link. It will automatically redirect the applicant to the service page on the Tamilnadu e-District web portal.
Step 7: To continue, click on the ‘Proceed’ button.
Step 8: The applicant search form will open. The following details of the applicant are necessary to perform the search:
Step 2: Click on the button ‘Citizen Login’ and enter the correct login username and password.
Step 3: Now enter the Captcha code and click on the ‘Login’ button.
Step 4: Once the e-Sevai dashboard appears, click on ‘Services’ option on the left-hand side of the screen.
Step 5: The list of department wise services will appear. Select the ‘Revenue Department’ option.
Step 6: Next, click on ‘REV-115 Other Backward Classes (OBC) certificate’ link. It will automatically redirect the applicant to the service page on the Tamilnadu e-District web portal.
Step 7: To continue, click on the ‘Proceed’ button.
Step 8: The applicant search form will open. The following details of the applicant are necessary to perform the search:
- CAN (Common Account Number)
- Name
- Father name
- Mobile number
- Email ID
- Date of Birth