Bennisha
Expert
Published on: Jun 24, 2026
GSTR-5A Filing: GST Return for Non-Resident OIDAR Service Providers
Gstr 5a Return Filing is a mandatory monthly GST return designed specifically for Non-Resident Online Information and Database Access or Retrieval (OIDAR) Service Providers. This return must be filed on the GST portal for services supplied from a place outside India to individuals residing in India who are not registered under GST. GSTR-5A ensures proper tax compliance for cross-border digital services and helps the government track services provided by foreign entities to unregistered Indian consumers. This article gives you detailed information regarding GSTR-5A, Due dates, and the procedure to file it on the GST Portal.
Let's connect with IndiaFilings to file your GSTR-5A before the due date with expert guidance!!
What is GSTR-5A?
GSTR-5A is a monthly GST return that non-resident Online Information and Database Access or Retrieval (OIDAR) service providers must file for services offered to unregistered individuals or non-taxable persons in India. It covers services such as cloud solutions and online advertising. The return ensures tax compliance for foreign providers and must be submitted by the 20th of the month following the tax period, even for NIL returns. Key components include reporting taxable outward supplies, amendments, and tax liabilities. Notably, input tax credit (ITC) cannot be claimed under GSTR-5A, and prior period returns must be filed with taxes paid before submitting current returns.
What is the Meaning of OIDAR IN GST?
OIDAR in GST refers to Online Information Database Access and Retrieval services, which are services delivered through the internet and received by the user without any physical interaction with the supplier. These services are entirely digital, where the transaction, delivery, and consumption happen online. For example, when a consumer downloads an e-book and makes an online payment for it, it is considered an OIDAR service. Such services are taxable under GST, especially when provided by non-resident service providers to individuals in India.
What are the GST Regulations for OIDAR Services?
Under GST regulations, when OIDAR services are provided by a supplier located outside India to a registered business entity in India, the reverse charge mechanism applies. In this case, the Indian recipient is responsible for paying GST and fulfilling compliance requirements.
However, if the OIDAR services are supplied to an individual consumer (non-taxable online recipient) in India, the supplier located outside India becomes liable to pay IGST for such services. To facilitate this, the supplier or intermediary must obtain a single registration under the Simplified Registration Scheme by filing Form GST REG-10 on the GST portal.
What is the Last Date to File GSTR-5A?
Non-resident OIDAR service providers are required to file Form GSTR-5A on a monthly basis. As per GST regulations, the due date for filing GSTR-5A is on or before the 20th day of the month following the relevant tax period.
For example, if OIDAR services are provided in the month of January 2025, the GSTR-5A return must be filed by 20th February 2025.
Here are the due dates for GSTR-5A filing for 2025:
Month | Due Date |
January 2025 | 20th February 2025 |
February 2025 | 20th March 2025 |
March 2025 | 20th April 2025 |
April 2025 | 20th May 2025 |
May 2025 | 20th June 2025 |
June 2025 | 20th July 2025 |
July 2025 | 20th August 2025 |
August 2025 | 20th September 2025 |
September 2025 | 20th October 2025 |
October 2025 | 20th November 2025 |
Modes of Preparing Form GSTR-5A
The following modes can prepare GSTR-5A:
- Online entry data on the GST Portal after logging in.
- Use third-party applications from Application Software Providers (ASPs) through GST Suvidha Providers (GSPs).
Pre-Requisites for Filing Form GSTR-5A
Here are the prerequisites for filing GSTR-5A.
- The taxpayer should be a registered OIDAR service provider and should possess a valid GSTIN.
- The taxpayer should have a valid User ID and Password.
- The taxpayer should have a valid and non-expired/ non-revoked PAN-based Digital Signature (DSC) for filing with DSC.
Form GSTR-5A Filing Procedure
Given below are the steps to create and file details for GSTR-5A.
Step 1: Log in to the Portal The taxpayer has to log into the official GST Portal. Step 2: Enter the details The taxpayer has to enter their username and password. Step 3: Click Returns Dashboard Select the 'Returns' option from the 'Services' tab and click 'Returns Dashboard'. An alternate step to do this is to click the 'Returns Dashboard' link on the Dashboard. The 'File Returns' page appears on the screen.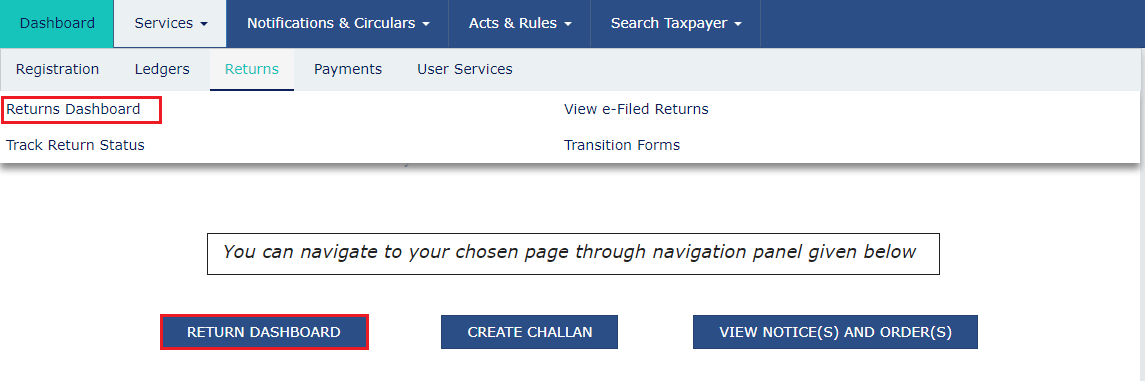 Step 4: Select Financial Year and Return Filing Period
Select the 'Financial Year and Return Filing Period' for which the return has to be filed from the drop-down list.
Step 5: Click Search
The taxpayer has to click the 'Search' button.
Step 4: Select Financial Year and Return Filing Period
Select the 'Financial Year and Return Filing Period' for which the return has to be filed from the drop-down list.
Step 5: Click Search
The taxpayer has to click the 'Search' button.
 Step 6: Click Prepare Online
The File Returns page appears with the due date of filing the returns, which the taxpayer must file using separate tiles. In the GSTR-5A tile, click the 'Prepare Online' button.
Step 6: Click Prepare Online
The File Returns page appears with the due date of filing the returns, which the taxpayer must file using separate tiles. In the GSTR-5A tile, click the 'Prepare Online' button.
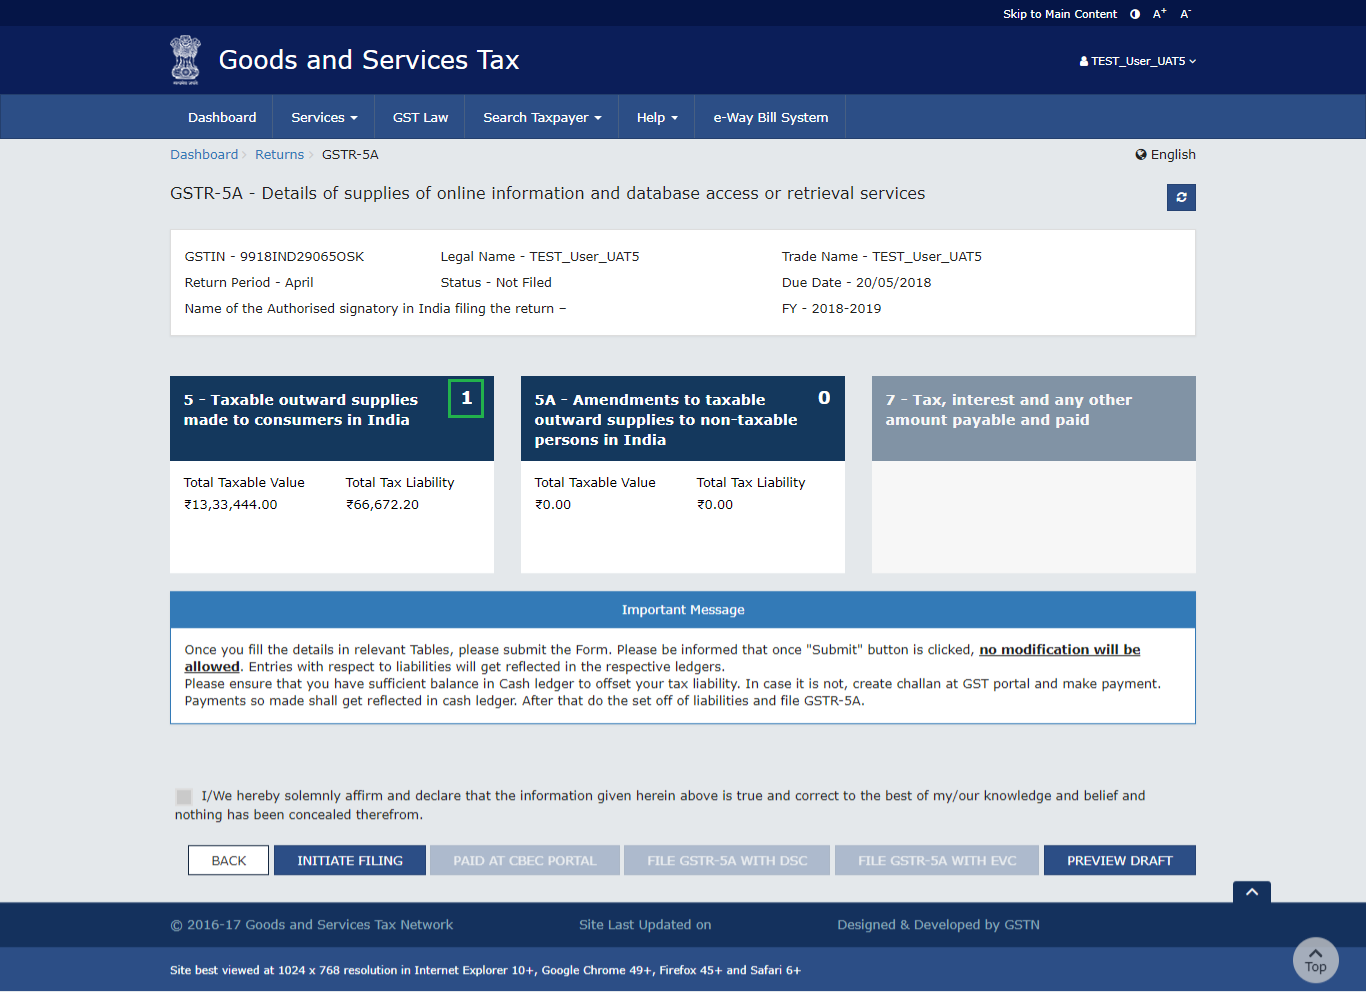
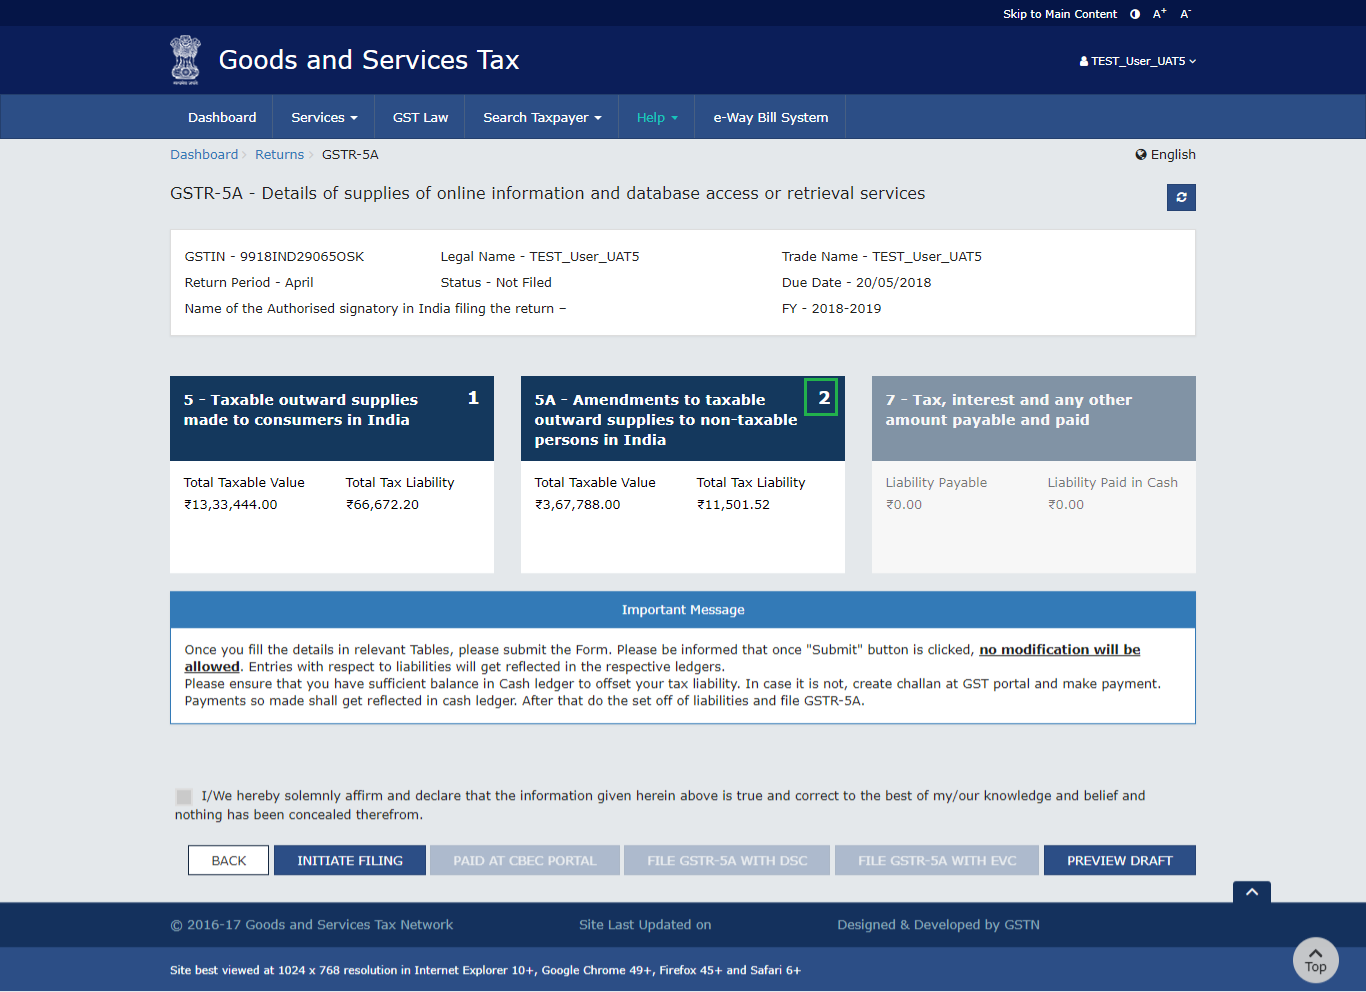
 Step 7: Enter the Details
- In the 'Taxable outward supplies made to consumers in India' tab, taxpayers can add details of taxable outward supplies that are made to consumers in India.
- In the "Amendments to taxable outward supplies to non-taxable persons in India" tab, the taxpayer has to enter the details of an amendment to taxable outward supplies to non-taxable people in India.
 Step 2: Click Add Details
The taxpayer has to click the 'Add Details' button to add details for a new POS.
Step 2: Click Add Details
The taxpayer has to click the 'Add Details' button to add details for a new POS.
 Step 3: Select the Place of Supply
The taxpayer has to select 'Place of Supply' from the drop-down list.
Step 4: Enter the Taxable Value
The taxpayer has to enter the 'Taxable Value'.
Step 5: Select Rate
The taxpayer has to select the 'Rate' from the drop-down list.
Step 6: Click Add
The taxpayer has to click the 'Add' button. The details are added. For states that have two rate supplies, click the 'Add Details' button again to add details.
Step 3: Select the Place of Supply
The taxpayer has to select 'Place of Supply' from the drop-down list.
Step 4: Enter the Taxable Value
The taxpayer has to enter the 'Taxable Value'.
Step 5: Select Rate
The taxpayer has to select the 'Rate' from the drop-down list.
Step 6: Click Add
The taxpayer has to click the 'Add' button. The details are added. For states that have two rate supplies, click the 'Add Details' button again to add details.
 Step 7: Click Save
The taxpayer has to click the 'Save' button.
Step 7: Click Save
The taxpayer has to click the 'Save' button.
 The taxpayer is directed to the GSTR-5A landing page that displays the Total Taxable Value and Total Tax Liability. Similarly, details of state-wise supplies made to consumers during the tax period can be added.
 B. Amendments to taxable outward supplies to non-taxable persons in India
Given below are the steps to add details of an amendment to taxable outward supplies to non-taxable people in India.
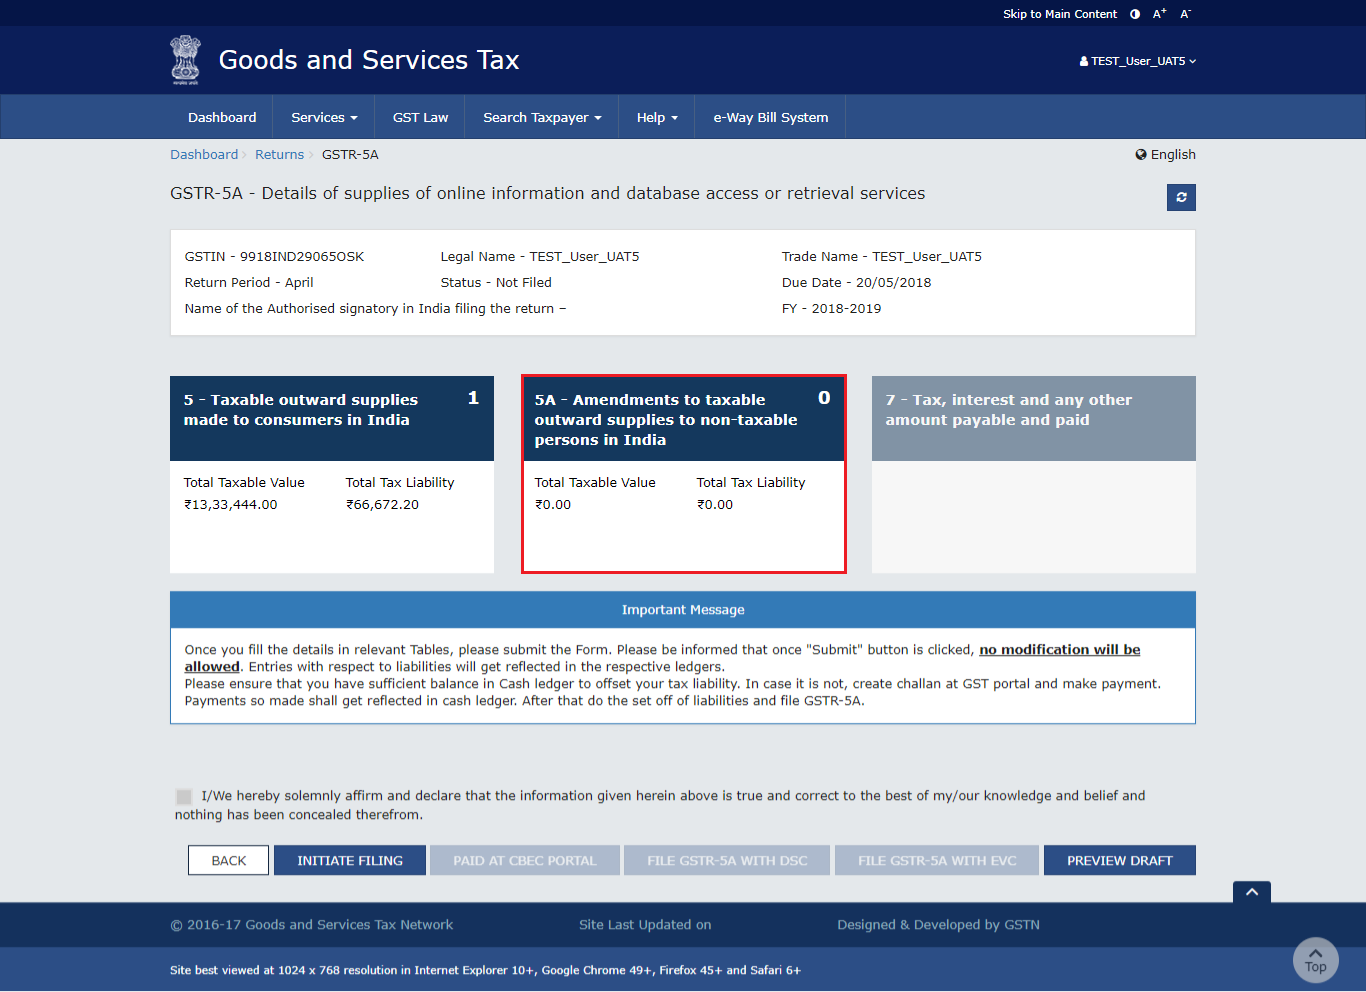
Step 1: Click Amendments to taxable outward supplies to non-taxable Persons
The taxpayer has to click the 'Amendments to taxable outward supplies to non-taxable persons' tile. It appears as given below.
B. Amendments to taxable outward supplies to non-taxable persons in India
Given below are the steps to add details of an amendment to taxable outward supplies to non-taxable people in India.
Step 1: Click Amendments to taxable outward supplies to non-taxable Persons
The taxpayer has to click the 'Amendments to taxable outward supplies to non-taxable persons' tile. It appears as given below.
 Step 2: Adding Details
The following details have to be added by the taxpayer.
Step 2: Adding Details
The following details have to be added by the taxpayer.
- Select the Financial Year
- Select the Months
- Select the Place of Supply
- Click the Search button
- Enter Taxable Value
- Select the Rate
- Enter the amount of Cess
- Click the 'Add' button
 The amended records appear on the screen. Click the 'Delete' button to delete the record. After making all the changes, click the 'Save' button.
 Step 3: Amending Details
- Select the Financial Year
- Select the Months
- Select the Place of Supply
- Click the Search button
 The results appear on the screen. Click the 'Edit' button to edit the results.
 The taxpayer has to click the 'Save' button.
 The taxpayer gets redirected to the GSTR-5A landing page by clicking the 'Back' button. The 'Amendments to taxable outward supplies to non-taxable persons in India' tile displays the Total Taxable Value and Total Tax Liability.
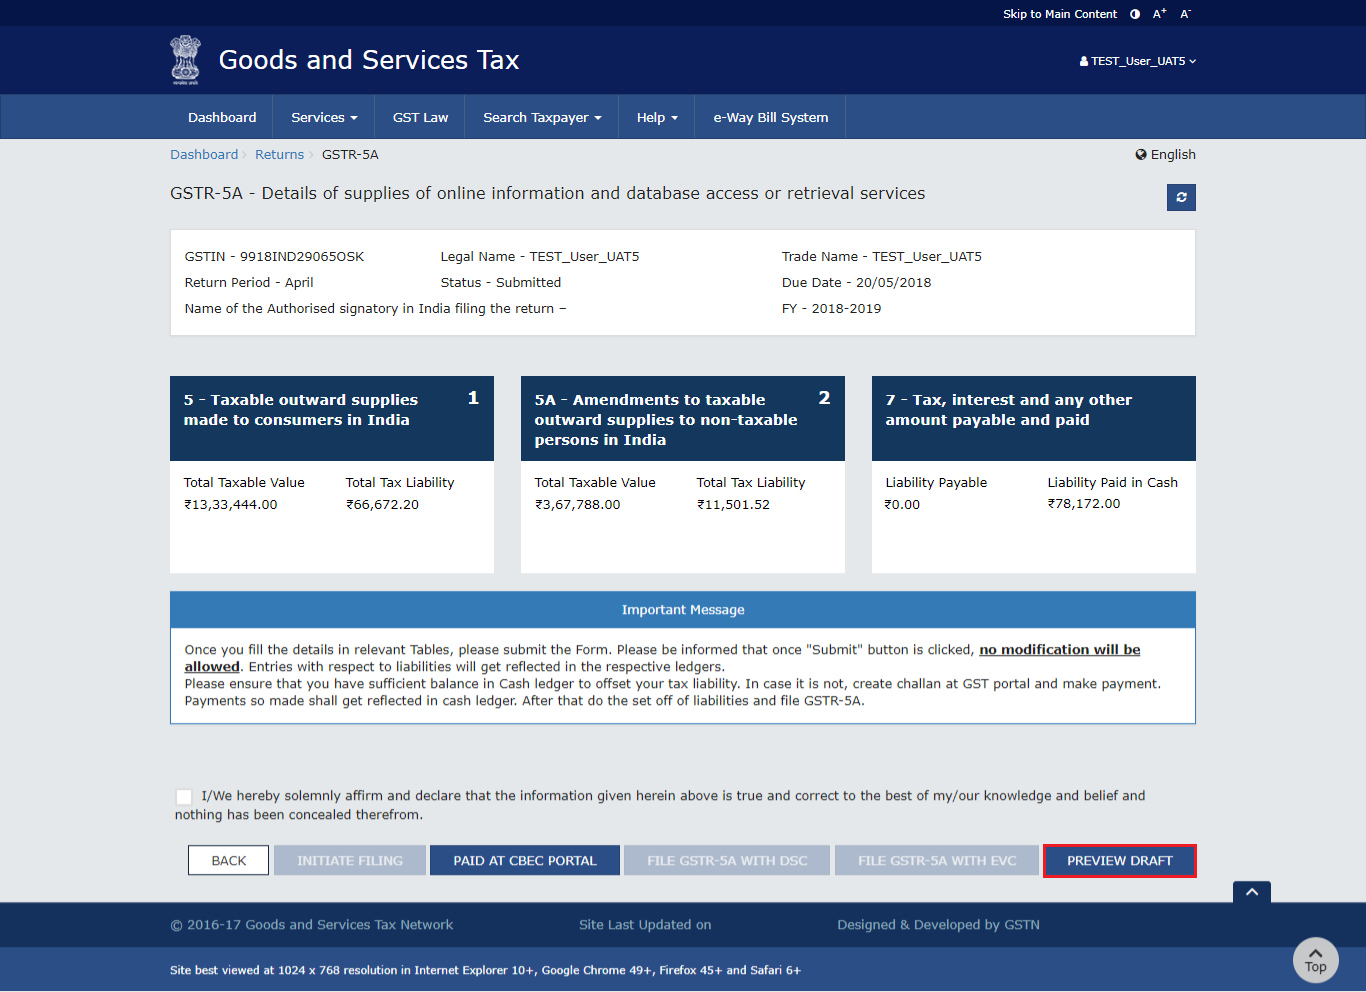
Previewing Draft for GSTR-5A
Given below are the steps to preview the draft for GSTR-5A.
Step 1: Click Preview Draft The taxpayer has to click the 'Preview Draft' button to preview the draft for GSTR-5A.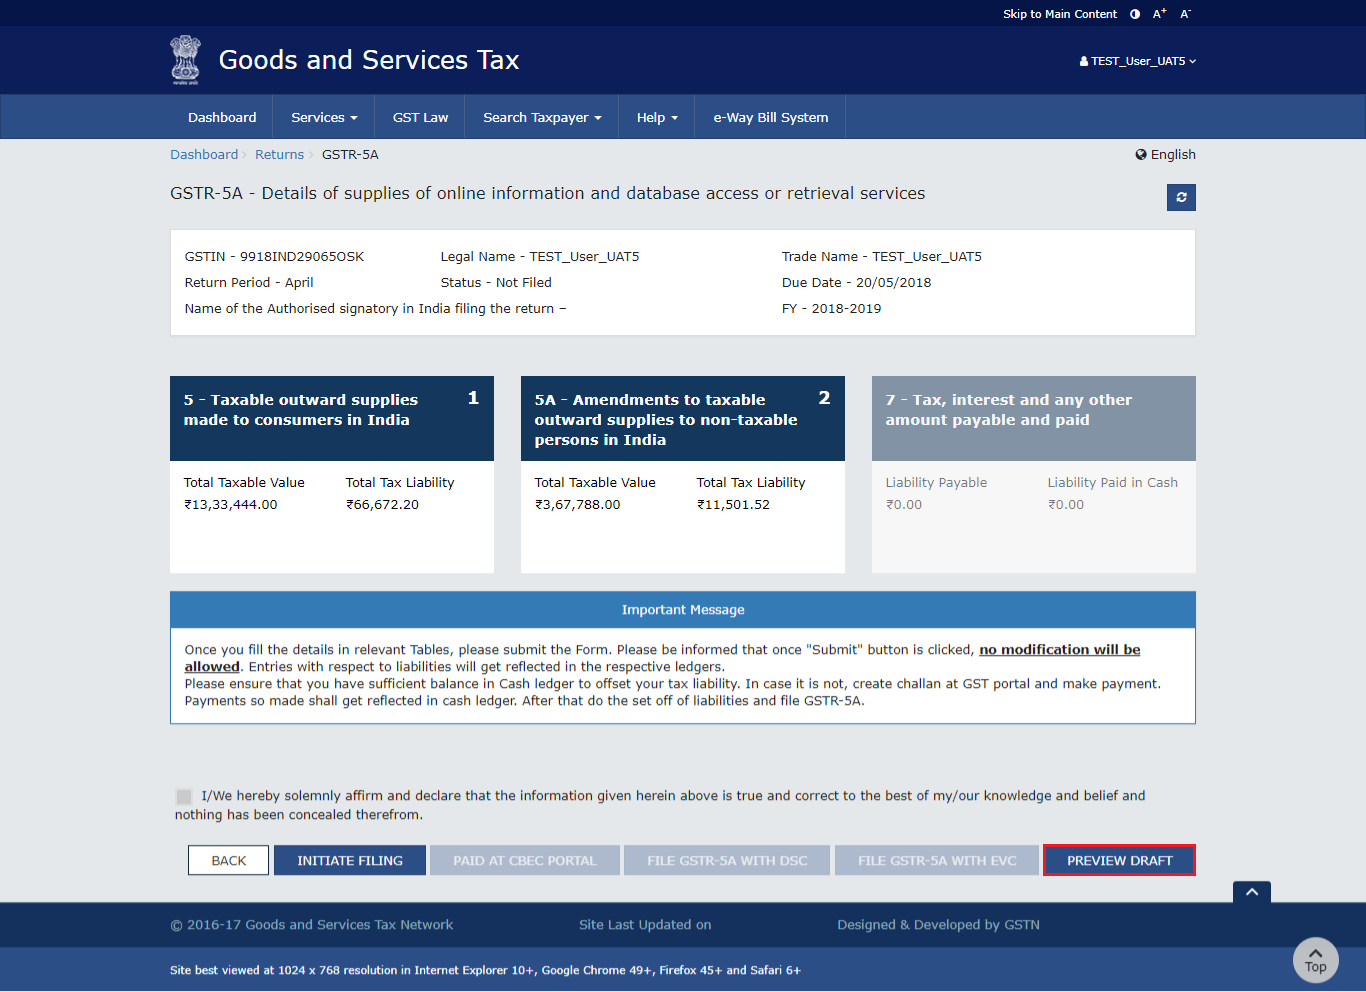 The draft is displayed in PDF format.
Initiate Filing for GSTR-5A
Here are the steps to initiate filing for GSTR-5A.
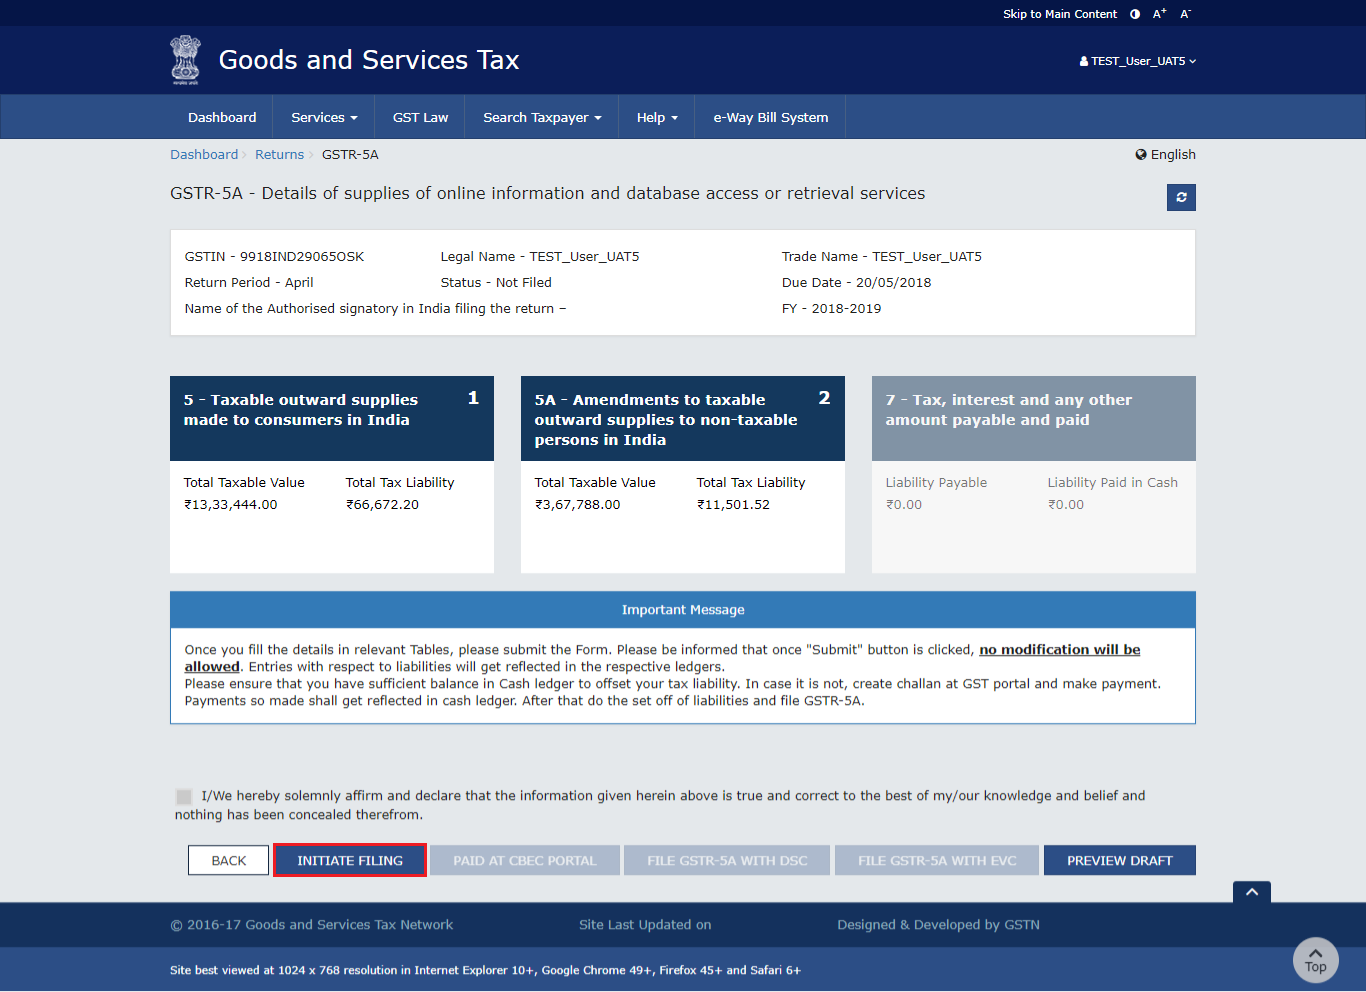
Step 1: Click Initiate Filing The taxpayer has to click 'Initiate Filing' on the landing page to initiate filing for GSTR-5A.- The 'Initiate Filing' button freezes the information that is filed for that particular month.
- The taxpayer must ensure sufficient balance in the Electronic Cash Ledger to offset the tax liability. In cases where there is not, a challan must be created in the GST Portal and the payment reflected in the Electronic Cash Ledger must be made. Then, proceed to the set-off liabilities and file GSTR-5A.
 Step 2: Confirm and Submit
A summary of the information is displayed on the screen. Click the 'Confirm and Submit' button. By clicking this button, it freezes the information that is filed for that particular month.
Step 2: Confirm and Submit
A summary of the information is displayed on the screen. Click the 'Confirm and Submit' button. By clicking this button, it freezes the information that is filed for that particular month.
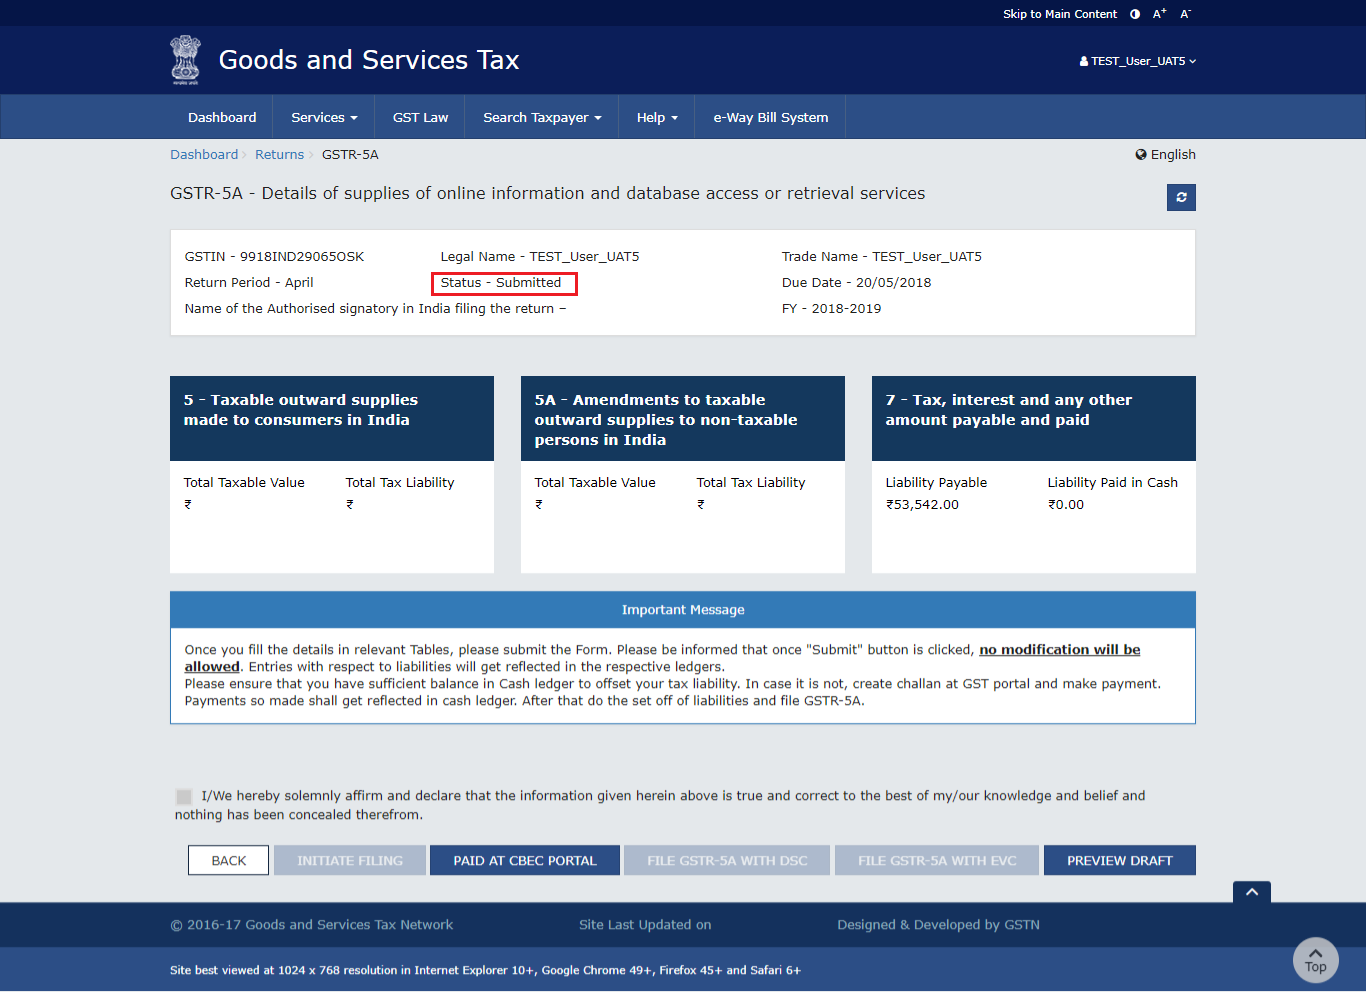
 After refreshing the page, the status changes to 'Submitted'.
Submitting the form enables the 'Calculation of interest or any other amount', 'Tax, interest and any other amount payable and paid' tile and 'Paid at CBEC Portal' button.
After refreshing the page, the status changes to 'Submitted'.
Submitting the form enables the 'Calculation of interest or any other amount', 'Tax, interest and any other amount payable and paid' tile and 'Paid at CBEC Portal' button.
Offset Liabilities
If the taxpayer has not paid the liability of GSTR-5A through CBEC Portal, follow the below-given steps.
Step 1: Click the Tax, Interest and any other amount payable and paid tile. The taxpayer has to click 'Tax, Interest and any other amount payable and paid" tile to view the details of interest or any other amount that is payable.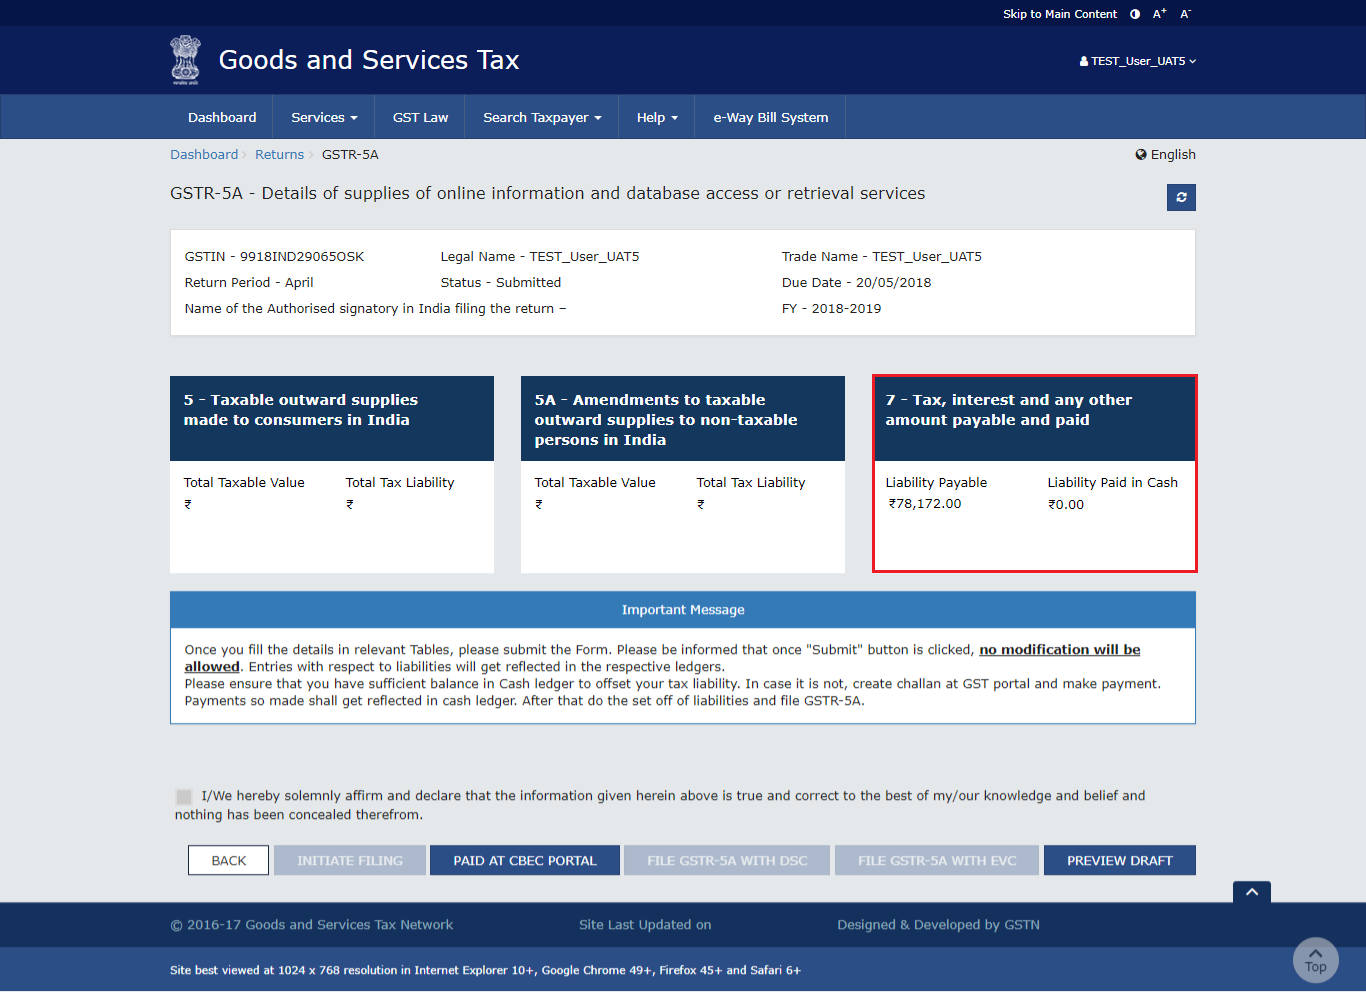 Step 2: Click Check Ledger Balance
The taxpayer has to click the 'Check Ledger Balance' button to know the available balance in the Electronic Cash Ledger.
Step 2: Click Check Ledger Balance
The taxpayer has to click the 'Check Ledger Balance' button to know the available balance in the Electronic Cash Ledger.
 Step 3: Click Ok
The taxpayer has to click the 'OK' button.
Step 3: Click Ok
The taxpayer has to click the 'OK' button.
 Step 4: Click Offset Liability
Click the 'Offset Liability' button after filling in the amount paid in various heads.
Step 4: Click Offset Liability
Click the 'Offset Liability' button after filling in the amount paid in various heads.
 Step 5: Click Close
The taxpayer has to click the 'Close' button.
Step 5: Click Close
The taxpayer has to click the 'Close' button.
 Step 6: Click Back
The liability is offset, and the debit number is displayed. Click the 'Back' button.
Step 6: Click Back
The liability is offset, and the debit number is displayed. Click the 'Back' button.
 Step 7: Preview Draft
Click on the 'Preview Draft' button to preview the draft.
Step 7: Preview Draft
Click on the 'Preview Draft' button to preview the draft.
 The form appears in PDF format.
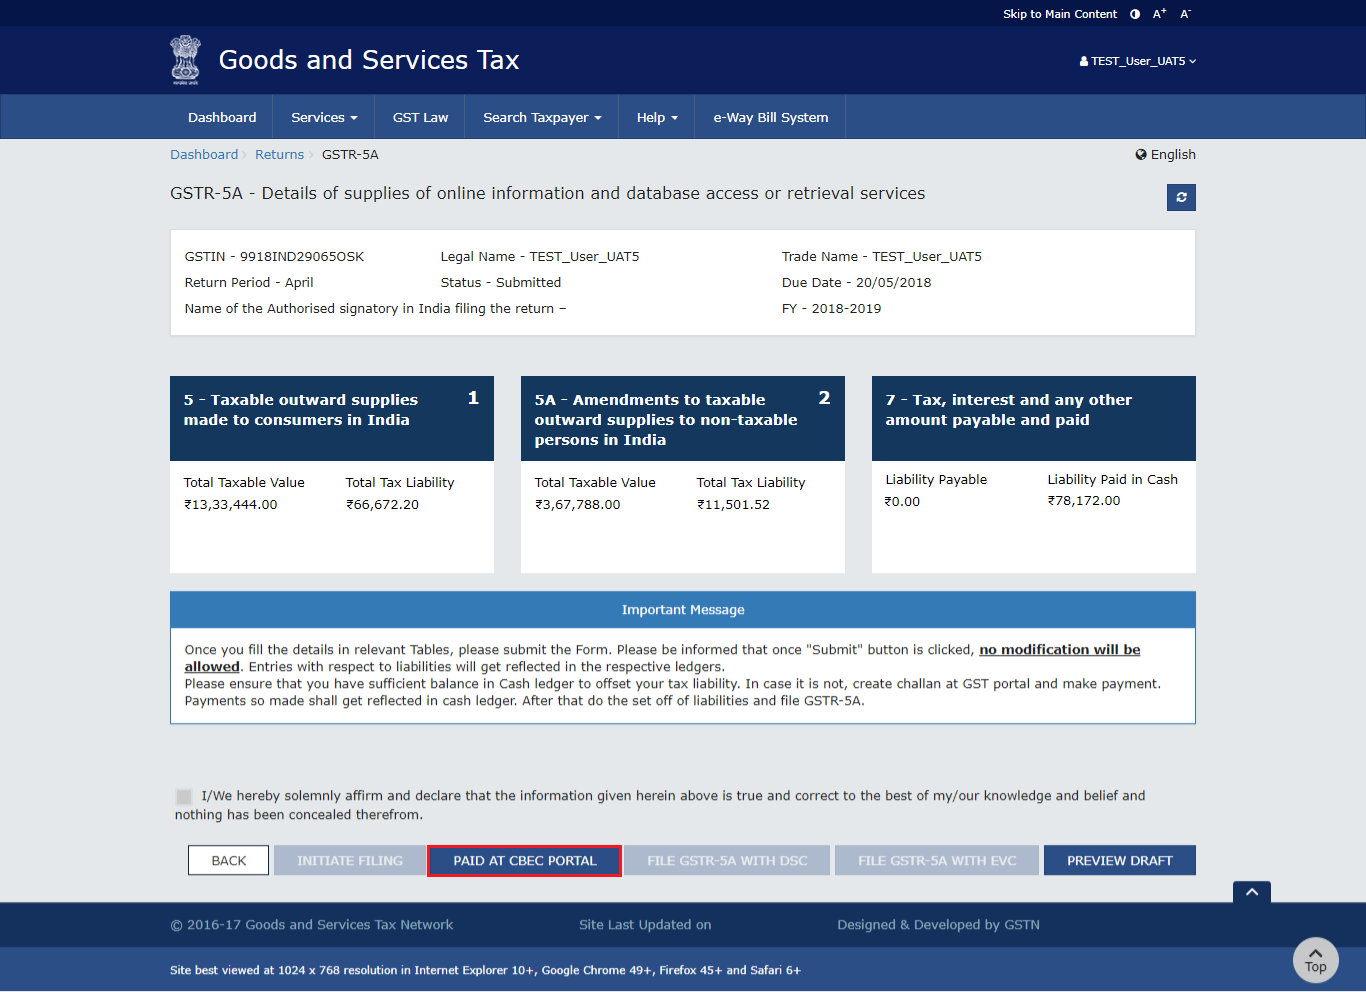
 If the taxpayer has paid the liability of GSTR-5A through CBEC Portal, then there is no requirement to opt for net banking to pay the liability through cash. Follow the below-given steps.
Step 1: Click Paid at CBEC Portal
The taxpayer has to click 'Paid at CBEC Portal'.
If the taxpayer has paid the liability of GSTR-5A through CBEC Portal, then there is no requirement to opt for net banking to pay the liability through cash. Follow the below-given steps.
Step 1: Click Paid at CBEC Portal
The taxpayer has to click 'Paid at CBEC Portal'.
 Step 2: Click Yes
The taxpayer has to click the 'Yes' radio button.
Step 3: Enter the Reference Number and Date of Payment
The taxpayer must enter the Reference Number and the date of payment as generated in the CBEC Portal.
Step 2: Click Yes
The taxpayer has to click the 'Yes' radio button.
Step 3: Enter the Reference Number and Date of Payment
The taxpayer must enter the Reference Number and the date of payment as generated in the CBEC Portal.
- The Payment Reference Number should be numeric or alphanumeric and up to 25 digits.
- After submitting the details, post the credit entry to the Electronic Liability Register, and the taxpayer can file the return. After filing the return, the tax authorities of CBEC will verify the payment mode.
 Step 4: Click Close
The taxpayer has to click the 'Close' button.
Step 4: Click Close
The taxpayer has to click the 'Close' button.
 Step 5: Click Preview Draft
The taxpayer has to click the 'Preview Draft' option to have a preview of the draft.
Step 5: Click Preview Draft
The taxpayer has to click the 'Preview Draft' option to have a preview of the draft.
 Form GSTR-5A appears in PDF format.
Filing with DSC/ EVC
Filing of GSTR-5A is possible using either DSC/EVC.
Step 1: Select the Declaration checkbox The taxpayer has to select the 'Declaration' checkbox. Step 2: Select the Authorized Signatory The taxpayer has to select the 'Authorized Signatory' from the drop-down list. Step 3: File GSTR-5A with DSC or File GSTR-5A with EVC The taxpayer has to either click on 'File GSTR-5A with DSC' or 'File with GSTR-5A with EVC'. Authentication with DSC is possible if the authorized signatory has a DSC issued in an Indian PAN. Following the filing of GSTR-5A, the Authorized Signatory's registered email ID and mobile number receives an acknowledgement through e-mail and SMS.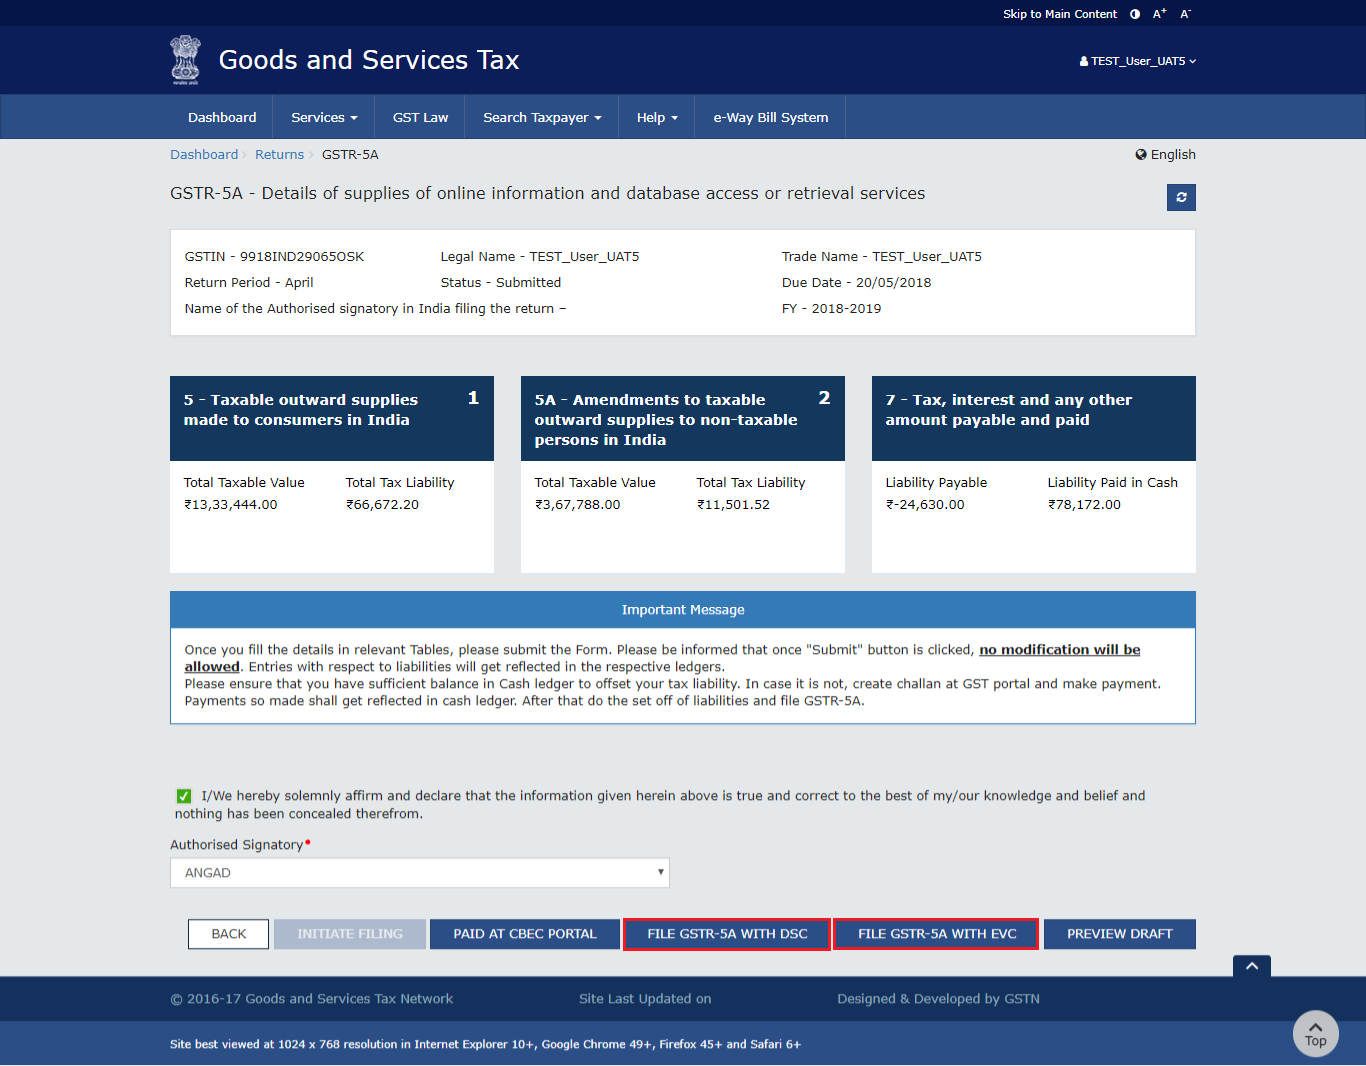 File with DSC
- The taxpayer has to click the 'Proceed' button.

- Select the certificate. Then click the 'Sign' button.
- The taxpayer has to click the 'Proceed' button.
- The taxpayer must enter the OTP sent to the Authorized Signatory's registered email ID and mobile number in the GST Portal and then click the 'Verify' button. A success notification appears on the screen.
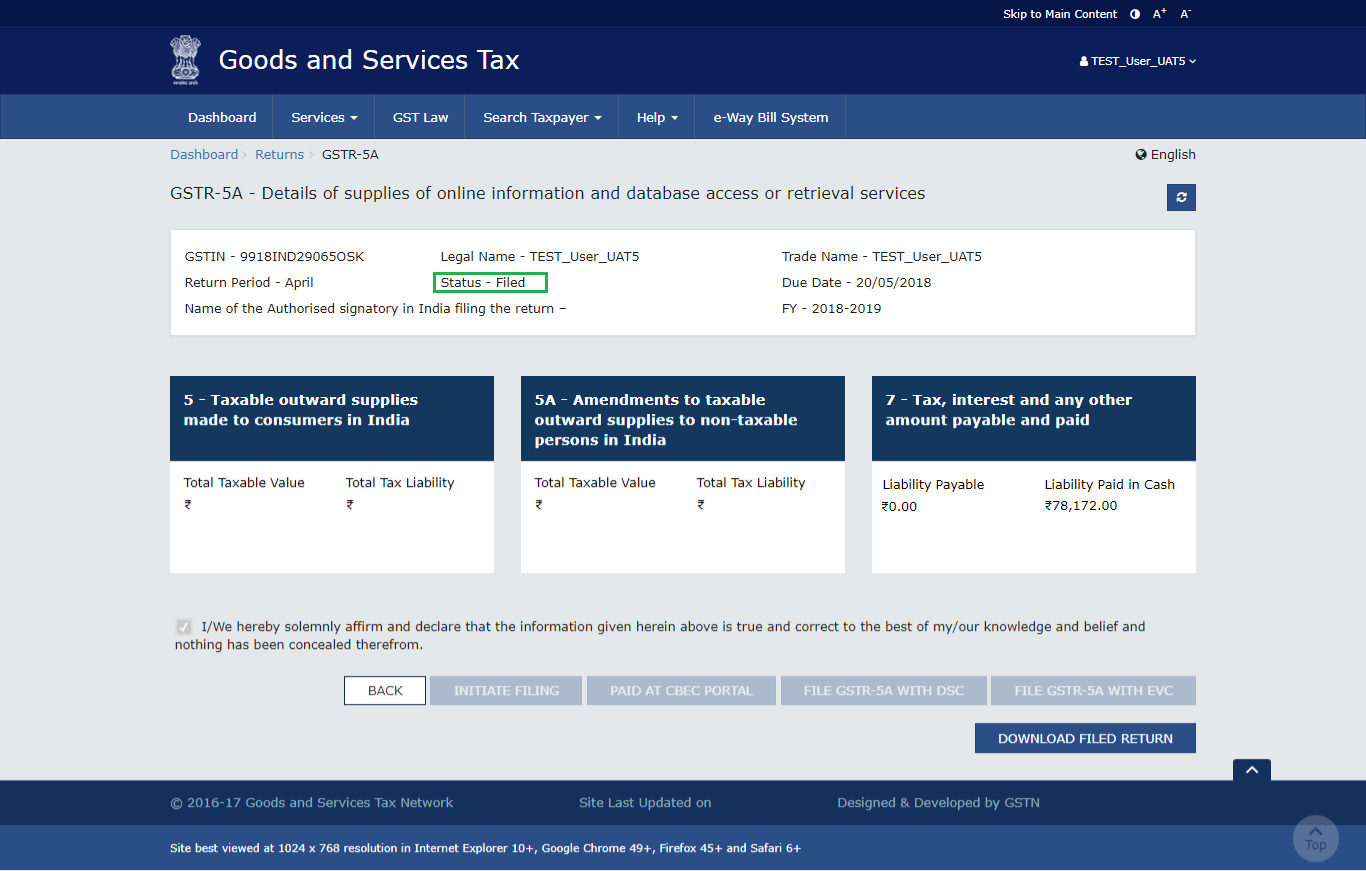
 Step 4: Click Close
The taxpayer has to click the 'Close' button. The status changes to 'Filed'.
Step 4: Click Close
The taxpayer has to click the 'Close' button. The status changes to 'Filed'.
 Following the filing of GSTR-5A, the Authorized Signatory's registered email ID and mobile number receive an acknowledgement through e-mail and SMS.
Download the Form
The taxpayer has to click the 'Download Filed Return' button.
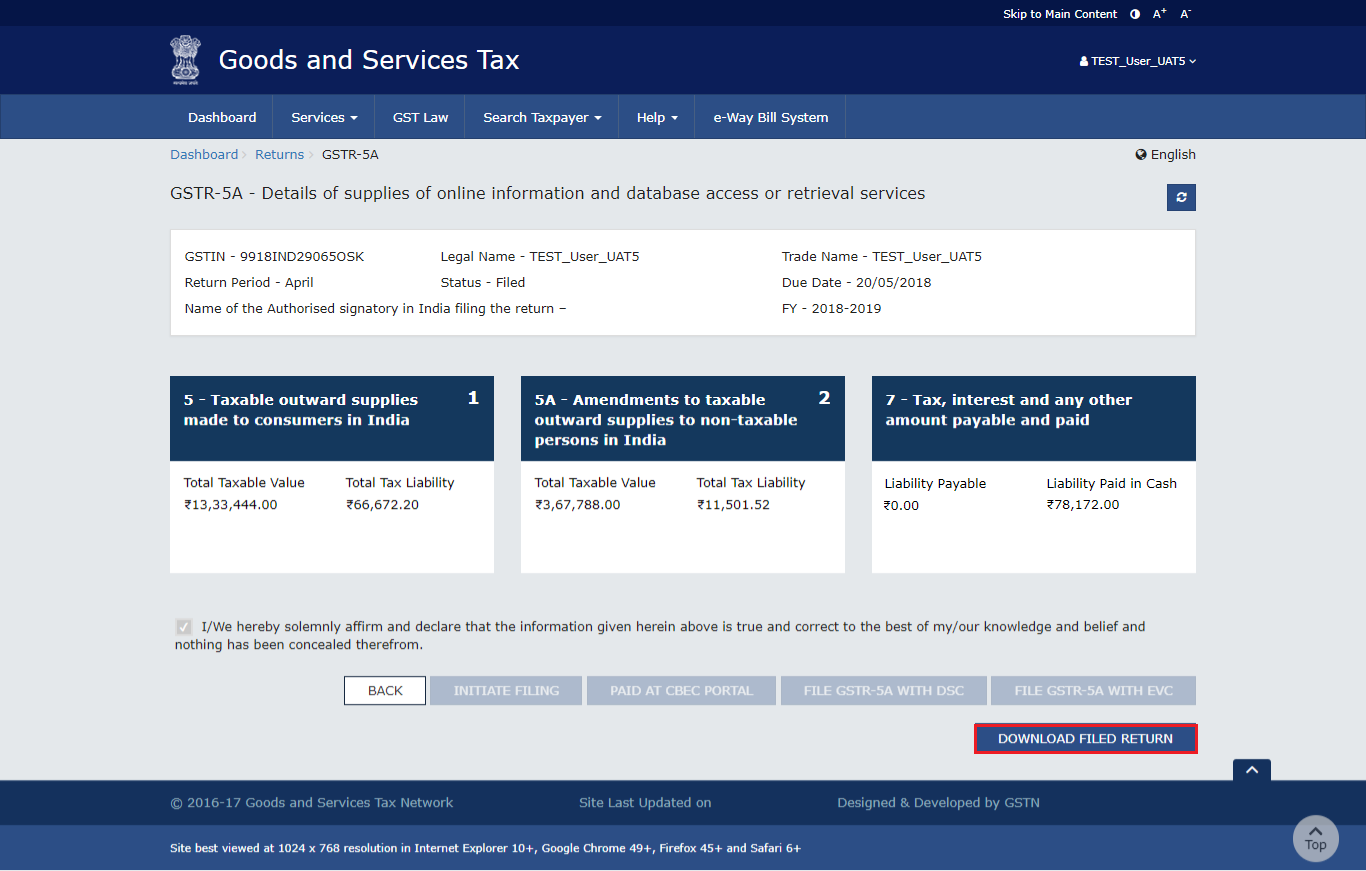 The return is available in PDF format for download.
Easily File your GSTR-5A Before the Due Date with IndiaFilings!
File your GSTR-5A effortlessly before the due date with IndiaFilings. Our expert team ensures timely and accurate filing for non-resident OIDAR service providers, helping you stay compliant with GST regulations. Avoid penalties and last-minute hassles — let IndiaFilings handle your monthly GSTR-5A filing smoothly and efficiently.