Chris John
Expert
Published on: Apr 20, 2026
Passport Address Change
A passport is an essential document that every citizen must have in order to travel outside the country. More than that, a passport is a proof of identity and is widely accepted for various purposes. Therefore, when an individual moves permanently from their current permanent address, it is of utmost importance that they should have their new permanent residential address be updated on their passport with the help of
Passport Seva. In this article, we discuss the process and requirements for a Passport Address Change in India.Documents Required
The following documents are required to be submitted when you want to change your address on your passport.
- Original old Passport
- Copy of payment receipt or challan receipt
- Copy of your online application.
- Self-attested copies of the passport's first two and last two pages.
- Self-attested copies of the page of observation, if any, made by Passport
- Issuing Authority.
- Self-attested copy of the ECR/ Non-ECR page.
- Self-attested copies of the validity extension page, if any, in respect of short validity passport.
- Address Proof: It should be noted that any of the following would suffice.
- Aadhaar Card
- Election Commission Photo/Voter ID card
- Electricity bill
- Water Bill
- Mobile Number/ Landline Number
- Proof of an LPG Connection
- A registered Rental Agreement
- Income Tax Assessment Order
- Photo passbook of an existing bank account. The bank may be a scheduled private sector Indian bank, scheduled public sector bank, or a regional rural banks only.
- Any certificate from the current employer on letterhead.
- Passport copy of the spouse which should contain the first and the last page of the passport including family details. It should be noted that the applicant's present address must match the address mentioned in the spouse's passport as well.
- Passport copy of the applicant's parents, which should contain the first and the last page of the passport including family details, in the case of minors.
Requisite Fee
The fee that is required for the change of address in a passport is as follows.
| Applicant’s Age | Validity Required | Normal Charge | Tatkal Charge |
| Below 15 years of age | All | INR 1,000 | INR 3,000 |
| 15 - 18 years of age | 5 years or till the age of 18 years | INR 1000 | INR 3,000 |
| 10 years for 36-paged passport | INR 1,500 | INR 3,500 | |
| 10 years for 60-paged passport | INR 2,000 | INR 4,000 | |
| 18 years of age and above | 10 years for 36-paged passport | INR 1,500 | INR 3,500 |
| 10 years for 60-paged passport | INR 2,000 | INR 4,000 |
Process
In order to change the address on your passport, it has to be
re-issued, which is quite simple. You have to visit a Passport Seva Kendra closest to you and make an application. The requisite fee mentioned above would have to be paid by the applicant for the re-issue process. You may also apply for the same online. Below are the steps of the online procedure detailing on how to get your passport re-issued.Passport Login Registration
The following steps have to be completed to register yourself on the Passport Seva portal.
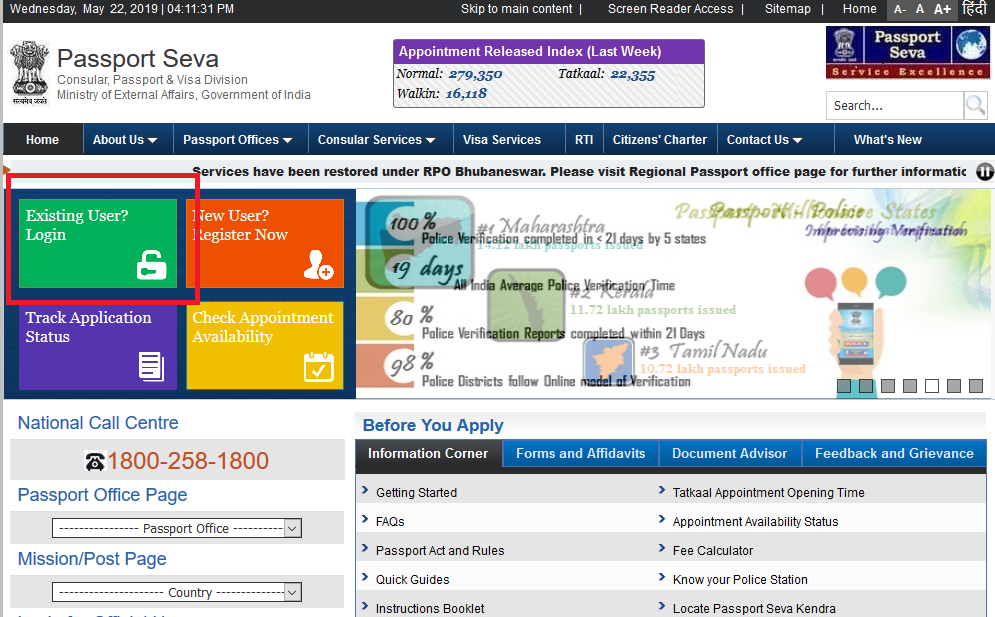
Step 1: Visit the official website of Passport Seva.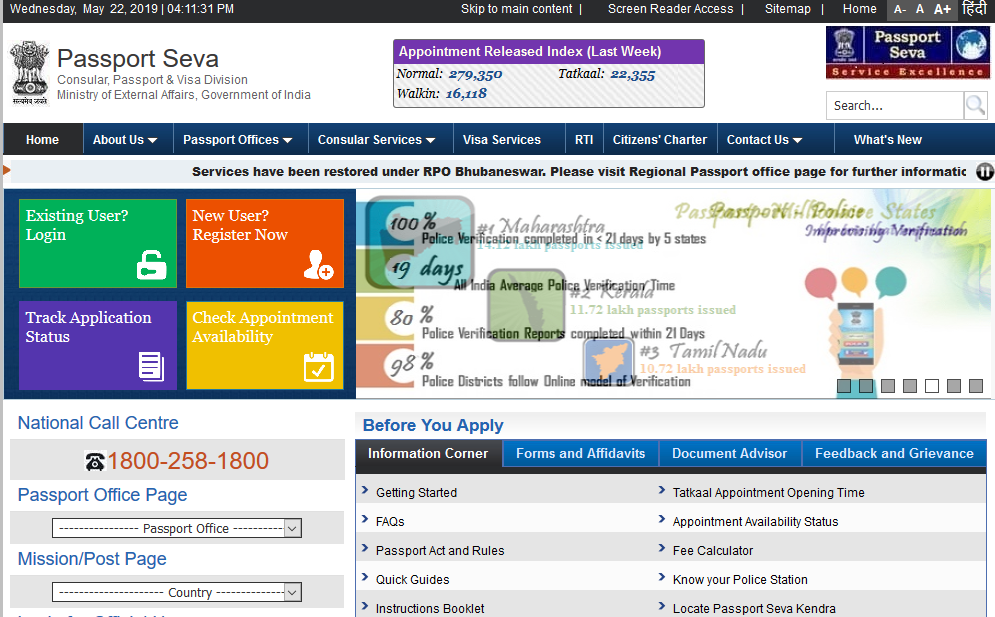 Step 1-Passport Address Change
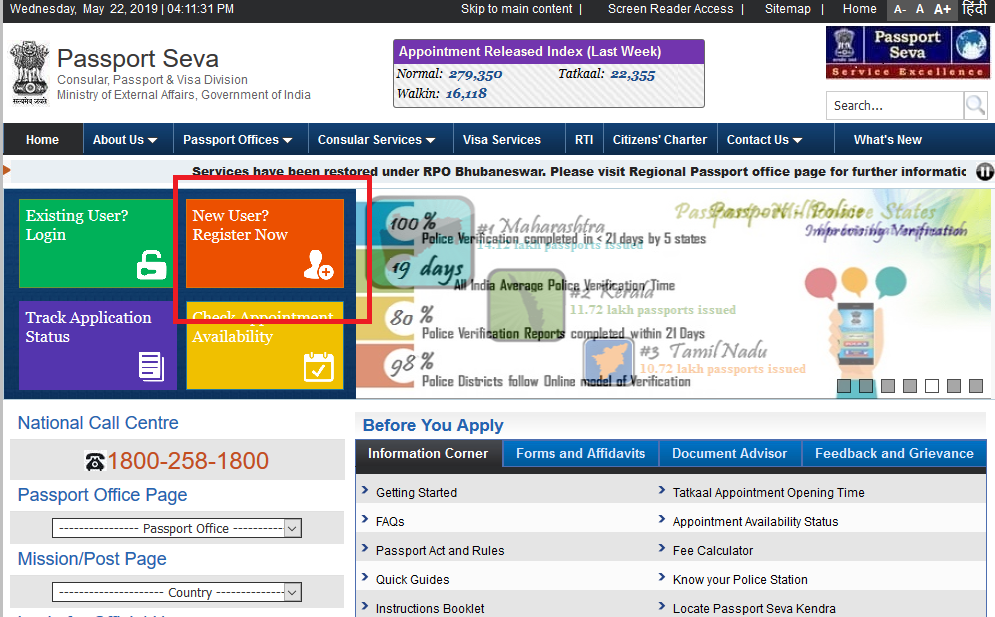
Step 2: Click on the New User? Register Now tab.
Step 1-Passport Address Change
Step 2: Click on the New User? Register Now tab.
 Step 2-Passport Address Change
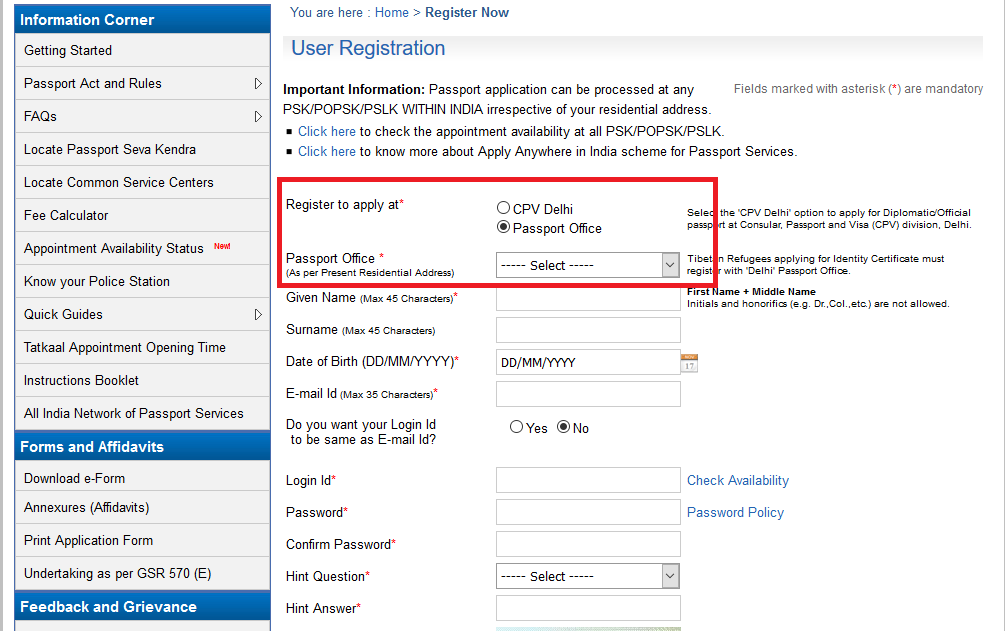
Step 3: Now, select the Passport Office that is closest to your location.
Step 2-Passport Address Change
Step 3: Now, select the Passport Office that is closest to your location.
 Step 3-Passport Address Change
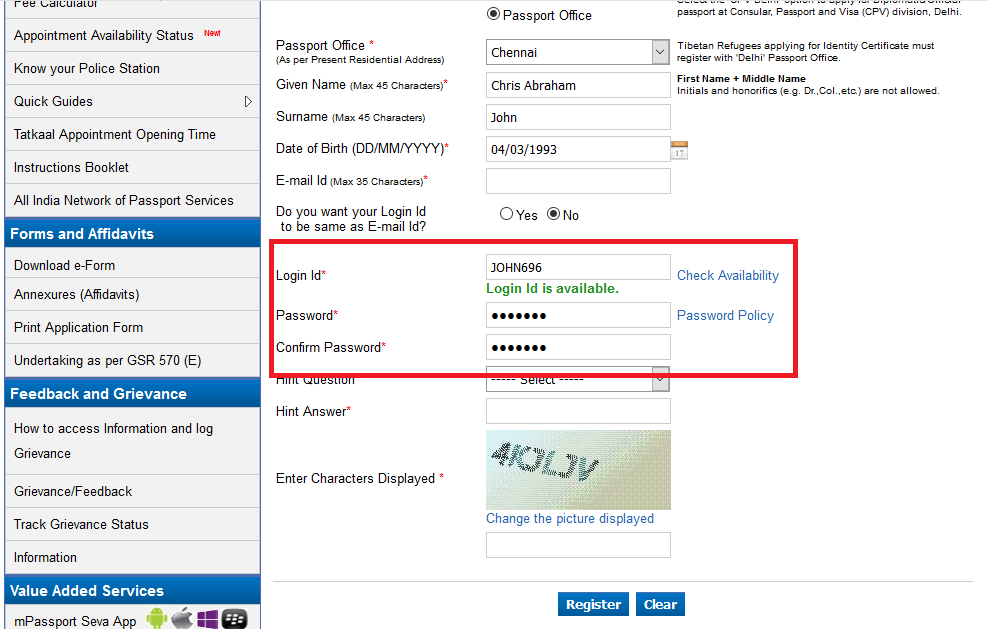
Step 4: Enter the essential personal details, as shown on the page.
Step 5: Create your Login ID and Password as per the portal's terms and conditions.
Step 3-Passport Address Change
Step 4: Enter the essential personal details, as shown on the page.
Step 5: Create your Login ID and Password as per the portal's terms and conditions.
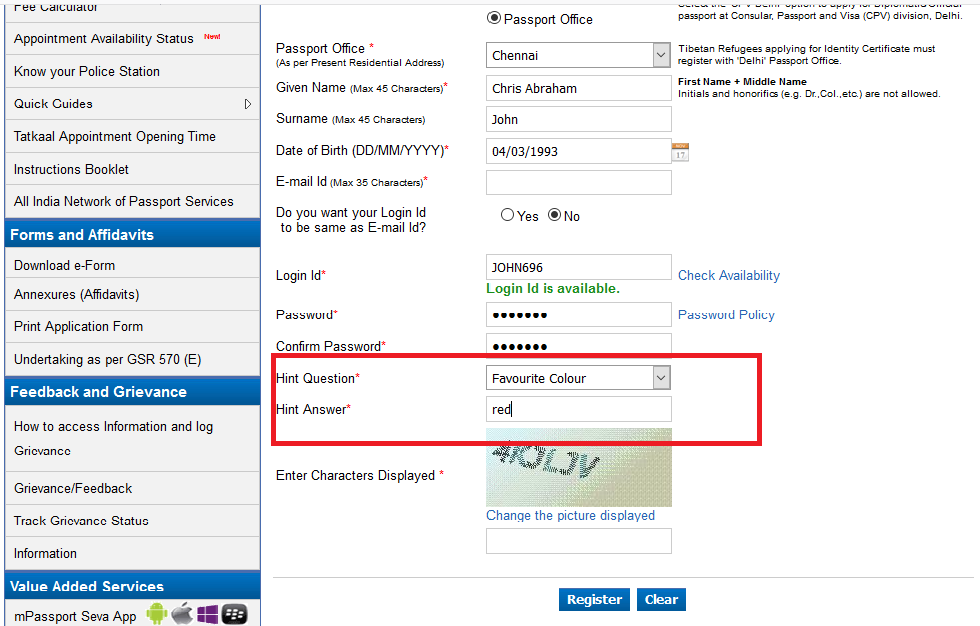
 Step 5-Passport Address Change
Step 6: Select the Hint Question and Answer as you require. This will come in handy your log in details are lost.
Step 5-Passport Address Change
Step 6: Select the Hint Question and Answer as you require. This will come in handy your log in details are lost.
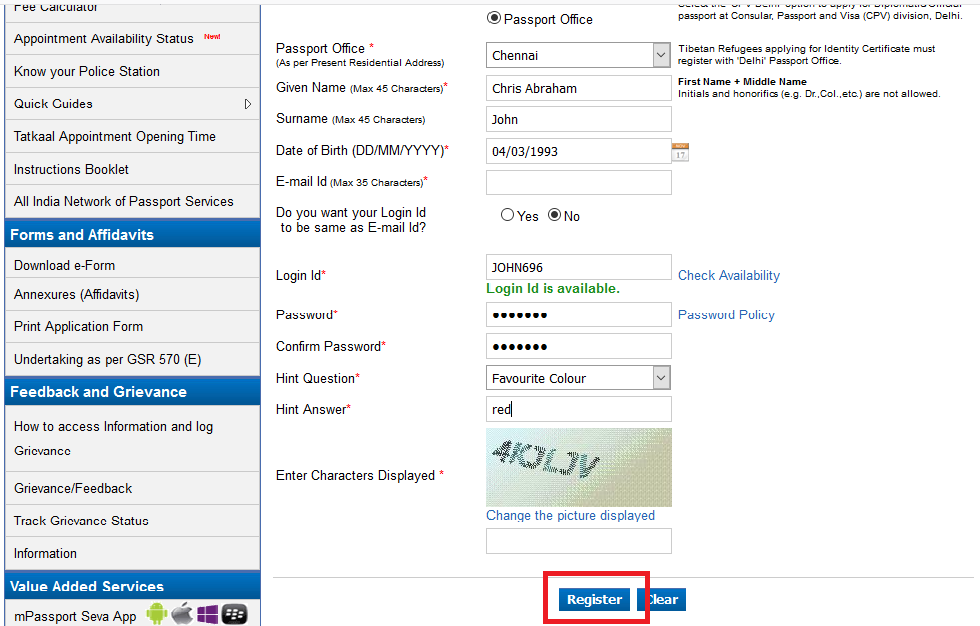
 Step 6-Passport Address Change
Step 7: Click on the Register icon.
Step 6-Passport Address Change
Step 7: Click on the Register icon.
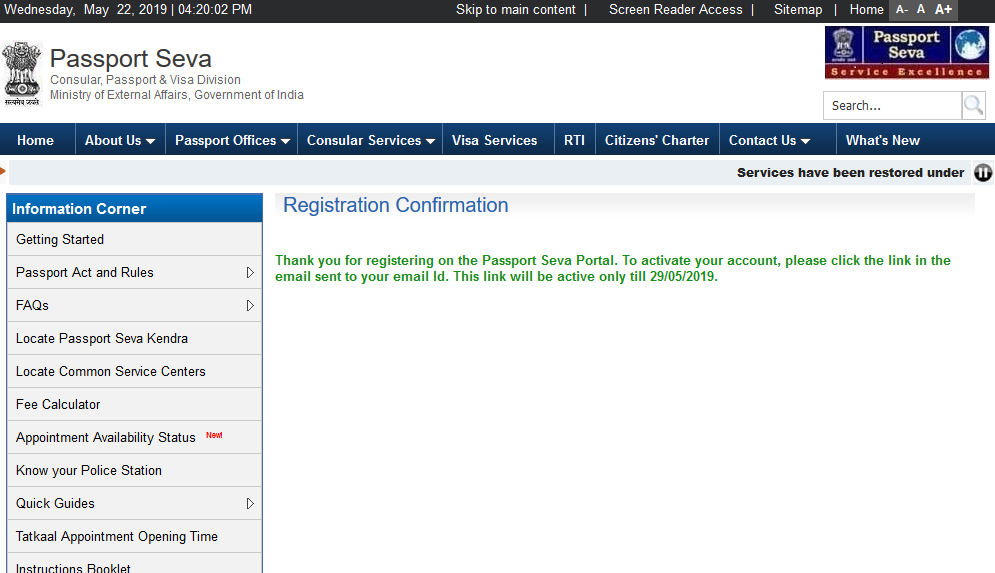
 Step 7-Passport Address Change
Step 8: Now, you will receive an activation link in your registered email. Click on the link to activate your Passport Seva account.
Step 7-Passport Address Change
Step 8: Now, you will receive an activation link in your registered email. Click on the link to activate your Passport Seva account.
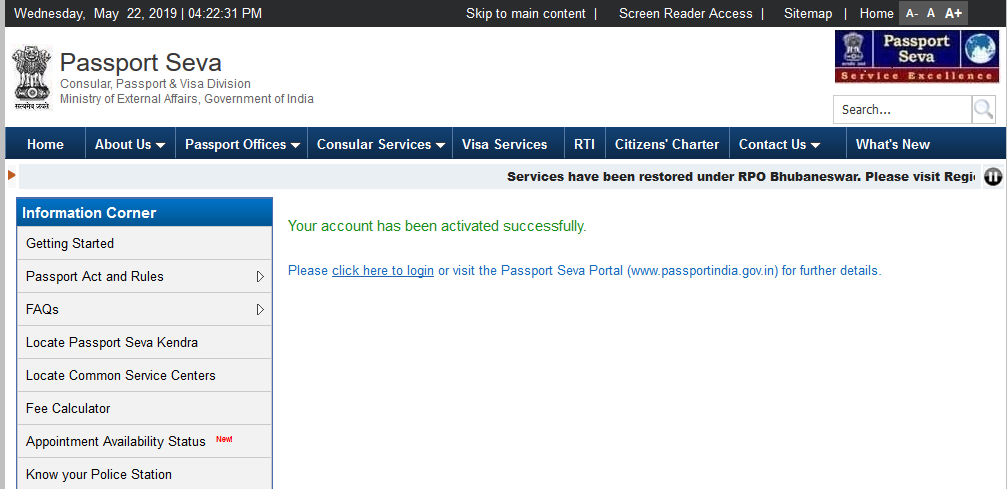
 Step 8-Passport Address Change
Step 9: Your account is now activated. You may now proceed with your application to renew your passport.
Step 8-Passport Address Change
Step 9: Your account is now activated. You may now proceed with your application to renew your passport.
 Step 9-Passport Address Change
Passport Renewal Application
Below given are the steps to be followed in order to submit your application for the renewal of your passport on the Passport Seva portal.
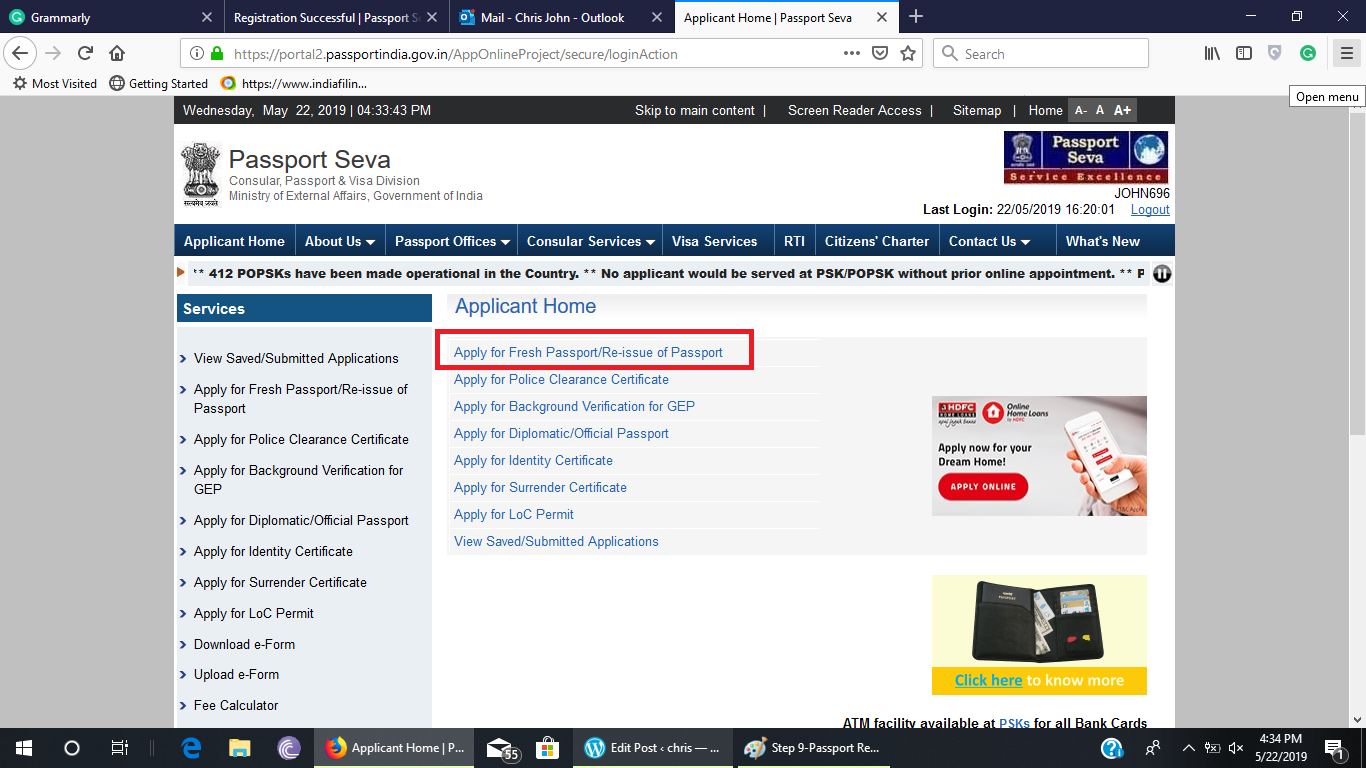
Step 1: Visit the official website of Passport Seva. Step 1A-Passport Address Change
Step 2: Click on the link Existing User? Login icon.
Step 1A-Passport Address Change
Step 2: Click on the link Existing User? Login icon.
 Step 2B-Passport Address Change
Step 3: Now, you must click on the Apply for fresh passport/ Re-issue of passport tab.
Step 2B-Passport Address Change
Step 3: Now, you must click on the Apply for fresh passport/ Re-issue of passport tab.
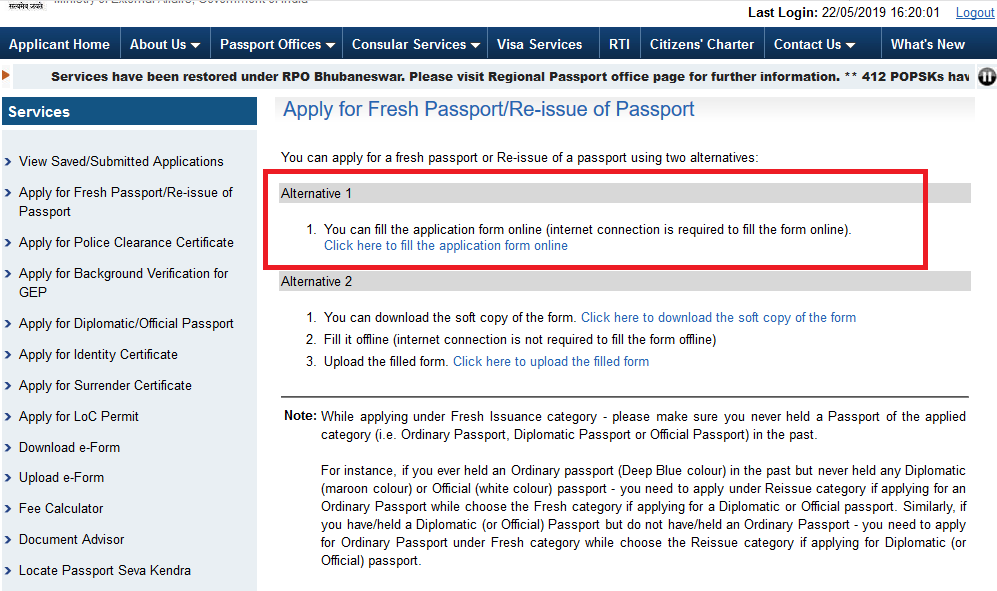
 Step 3A-Passport Address Change
Step 4: Next, fill the Form available on the portal.
Step 3A-Passport Address Change
Step 4: Next, fill the Form available on the portal.
 Step 4A-Passport Address Change
Note: You will have to provide details like current address, of their spouse, amongst other necessary details. You would also be required to provide the details of two local references which could be contacted for police verification. You must click on the Validate option and save the form after you are done entering the city or village. The saved file is then uploaded to the same page from where it was downloaded. By doing so, the details will automatically be entered in the application form. In the end, you need to verify all the information to ensure that there are no mistakes in the application form.
Step 4A-Passport Address Change
Note: You will have to provide details like current address, of their spouse, amongst other necessary details. You would also be required to provide the details of two local references which could be contacted for police verification. You must click on the Validate option and save the form after you are done entering the city or village. The saved file is then uploaded to the same page from where it was downloaded. By doing so, the details will automatically be entered in the application form. In the end, you need to verify all the information to ensure that there are no mistakes in the application form.
 Step 4B-Passport Address Change
Step 5: Review all the information that you have entered before submitting the Form. These details can not be changed later, and you may need to start again if there are errors.
Step 6: Click on the option to View Saved/ Submitted Application in order to schedule an appointment.
Note: You may schedule an appointment by clicking on the Schedule Appointment tab. Next, you need to select an available slot which is convenient for you. Once this is confirmed, the appointment at the passport office that you opted for at the designated time.
Step 7: Online payment is mandatory for booking appointments at the Passport Seva Kendra.
Step 8: Complete the payment process through any of the accepted modes of payment.
NOTE: It should be noted that Tatkal applicants are only required to pay the normal fee while booking an appointment online. If the application is approved for the Tatkal option, the applicant may pay the remaining amount on the portal itself. Please note that this tatkal payment is non-refundable.
The following options are available for payment.
Step 4B-Passport Address Change
Step 5: Review all the information that you have entered before submitting the Form. These details can not be changed later, and you may need to start again if there are errors.
Step 6: Click on the option to View Saved/ Submitted Application in order to schedule an appointment.
Note: You may schedule an appointment by clicking on the Schedule Appointment tab. Next, you need to select an available slot which is convenient for you. Once this is confirmed, the appointment at the passport office that you opted for at the designated time.
Step 7: Online payment is mandatory for booking appointments at the Passport Seva Kendra.
Step 8: Complete the payment process through any of the accepted modes of payment.
NOTE: It should be noted that Tatkal applicants are only required to pay the normal fee while booking an appointment online. If the application is approved for the Tatkal option, the applicant may pay the remaining amount on the portal itself. Please note that this tatkal payment is non-refundable.
The following options are available for payment.
| Mode of Payment | Accepted Providers | Applicable Charges |
| Credit Cards | VISA/ MasterCard | 1.5% + service tax |
| Debit Cards | VISA/ MasterCard | 1.5% + service tax |
| Internet Banking | SBI and SBI Associate Banks | No charge |
| SBI Challan | The appropriate fee must be deposited at the nearest SBI branch after 3 hours of generating the challan and must not exceed 85 days to do so. | No charge |