
IndiaFilings
Expert
Published on: Jul 30, 2026
Adding a Supplier - LEDGERS Guide
Adding a supplier to you LEDGER is the first step to begin issuing purchase orders, purchase invoices and tracking payment or payables. In addition to basic accounting, using LEDGERS you can also keep track of your suppliers and verify the GSTIN on a real-time basis. LEDGERS Software is free.
You can start using LEDGERS by signup today. You can easily create add a supplier to your LEDGER by following these steps:- Login to your LEDGERS account. You can log in using this link.
- Once you have logged in to your account, select the business you would like to add a supplier.
- Go to Contacts -> Suppliers -> Add Supplier.
Adding Supplier
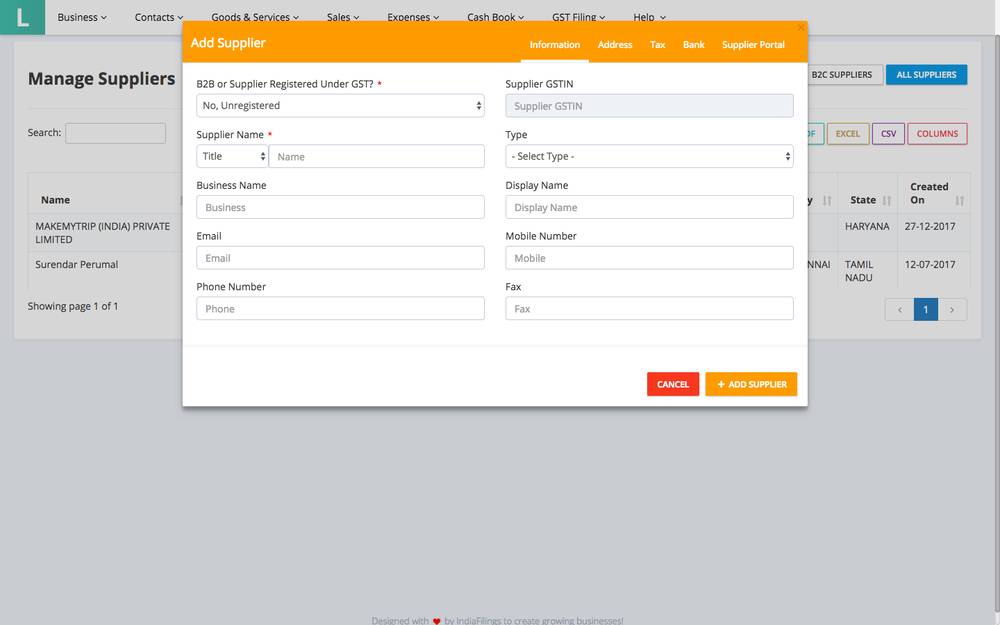 Adding Supplier
You will only have to provide a supplier name to add a supplier in LEDGERS. All other fields are optional. In case all other fields are left blank, the place of supply for the customer would be taken as the location of the business of the supplier.
If a supplier is not registered for GST, you can leave the B2B or Supplier Registered under GST? as No, Unregistered. Then, the supplier would show under unregistered suppliers in your supplier management page.
In case, you select Yes, GSTIN of the supplier would have to be provided under Supplier GSTIN in a valid format or left blank. If you enter a GSTIN, then the GSTIN will be checked against the GSTN Network and the Business Name as per GSTN will be auto-filled.
If you do not know the GSTIN of the supplier, you can leave the GSTIN blank and the supplier would receive an email for updating GSTIN on your LEDGERS. The supplier using the link can directly update billing details and the information will be ready for your verification under On Boarding. If you accept the information provided the supplier, the supplier master would be updated.
Once the information and address tab is updated with the necessary information, you can update the tax tab. In the tax tab various information about the supplier like PAN, TAN, TDS applicability, currency, preferred payment method along with bank account details and terms of payment can be updated easily. Also, you will be able to update if a reverse charge is to be applied on default for this supplier.
Adding Supplier
You will only have to provide a supplier name to add a supplier in LEDGERS. All other fields are optional. In case all other fields are left blank, the place of supply for the customer would be taken as the location of the business of the supplier.
If a supplier is not registered for GST, you can leave the B2B or Supplier Registered under GST? as No, Unregistered. Then, the supplier would show under unregistered suppliers in your supplier management page.
In case, you select Yes, GSTIN of the supplier would have to be provided under Supplier GSTIN in a valid format or left blank. If you enter a GSTIN, then the GSTIN will be checked against the GSTN Network and the Business Name as per GSTN will be auto-filled.
If you do not know the GSTIN of the supplier, you can leave the GSTIN blank and the supplier would receive an email for updating GSTIN on your LEDGERS. The supplier using the link can directly update billing details and the information will be ready for your verification under On Boarding. If you accept the information provided the supplier, the supplier master would be updated.
Once the information and address tab is updated with the necessary information, you can update the tax tab. In the tax tab various information about the supplier like PAN, TAN, TDS applicability, currency, preferred payment method along with bank account details and terms of payment can be updated easily. Also, you will be able to update if a reverse charge is to be applied on default for this supplier.
Supplier Portal
In the supplier portal tab, you can select if the supplier is to be provided access to the supplier portal by default. The default option is NO. If yes is selected, any supplier added to LEDGER would receive a welcome email requesting them to verify the information you had updated as their billing details. In case of any changes, the supplier can make the changes and the suggested changes would be held for approval. If supplier changes are accepted, the supplier master would be updated with the most recent information.
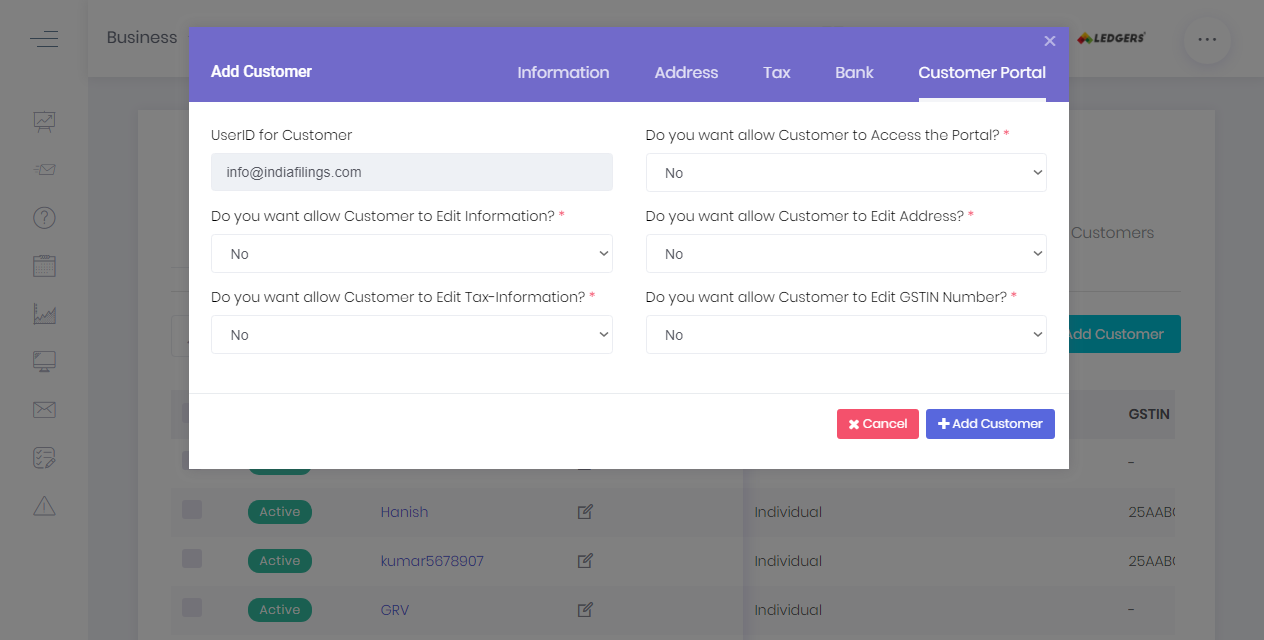 Supplier Portal